When your home in Readington, New Jersey starts feeling stuffy, dusty, or unevenly heated and cooled, your ductwork may be the culprit. A well-executed repair restores comfort, improves indoor air quality, and helps your HVAC system operate more efficiently. This step-by-step guide explains how to plan, diagnose, and perform common air duct repairs safely and effectively. Whether you live near the rolling farms of Readington Village or along the Raritan River valley, local weather—hot summers, cold winters, and spring pollen—puts your ducts to the test. If you discover damage beyond your comfort or skill level at any point, remember that you can always consult a qualified local team for air duct repair to ensure lasting results.
Before you pick up a tool, it helps to understand what you are repairing. Most homes in Readington feature a mix of sheet-metal trunk lines, flexible insulated branches (flex duct), and main plenums attached to the furnace or air handler. Connections are sealed with mastic and foil-backed tape, supported by hangers or straps, and insulated to prevent heat gain and loss. Over time, vibrations, critter activity, moisture, and renovation work can loosen connections, tear insulation, or dent sections. Your goal is to seal air leaks, resecure fittings, replace compromised segments, and confirm airflow is balanced.
Safety First and Preparation
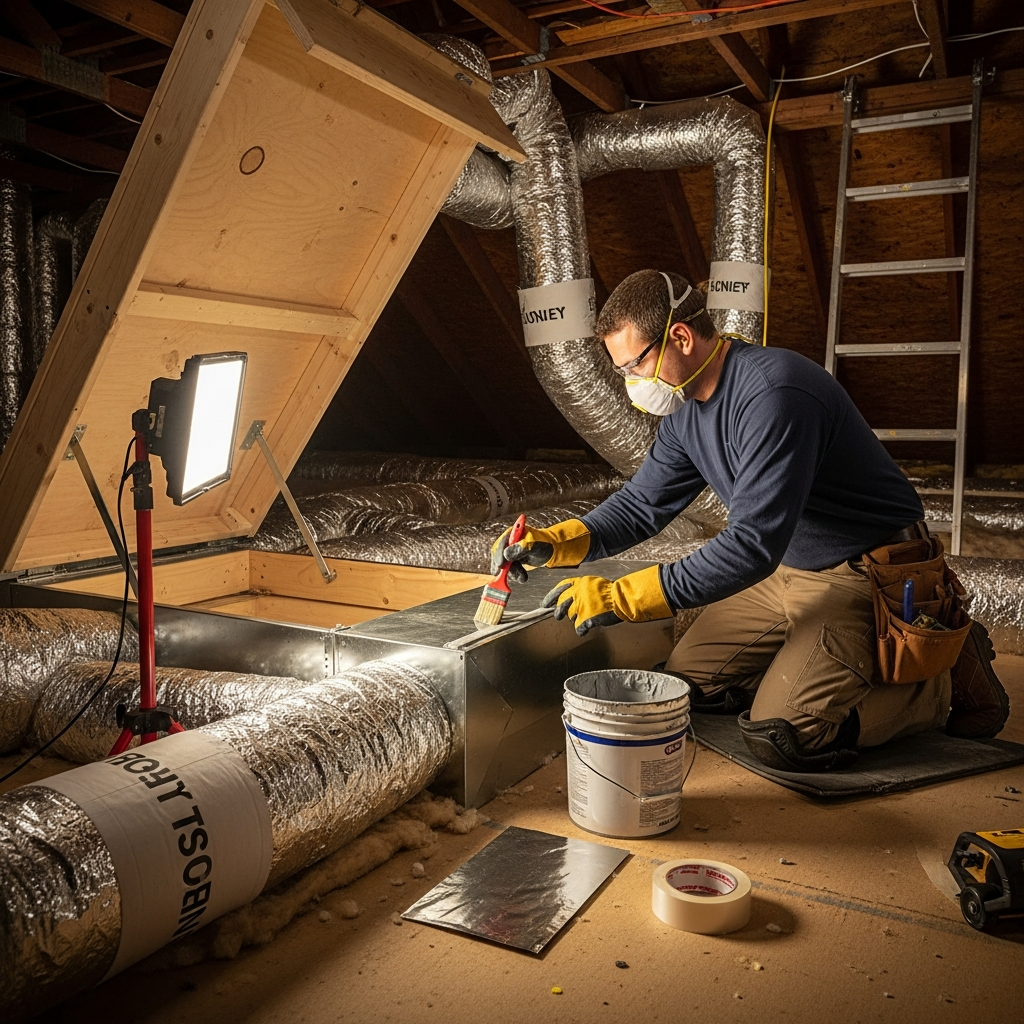
Safety is the foundation of any effective repair. Start by turning off the HVAC system at the thermostat and, if necessary, at the breaker. This prevents the blower from kicking on while you are inspecting or sealing ducts. Wear gloves, safety glasses, and a dust mask or respirator, especially if you suspect mold, rodent droppings, or accumulated dust. Use knee pads or a padded mat for crawlspaces, and bring adequate lighting for basements and attics common in Readington homes.
Gather materials: UL 181-rated foil tape, water-based mastic, a mastic brush, sheet-metal screws, metal snips, zip ties for flex duct inner liners, duct hangers or straps, a utility knife, a tape measure, and replacement flex duct or fittings if needed. Have a shop vacuum on hand to clear debris around repair sites, and a camera or smartphone to document pre- and post-repair conditions.
Initial Assessment: Finding the Real Problems
Walk the length of accessible ducts while the system is temporarily running for diagnosis (turn it off again before beginning repairs). Feel for drafts around seams, joints, and boot connections at floor or ceiling registers. Listen for whistling—often a telltale sign of air leaks. Look for gaps where foil tape has dried or peeled, crushed flex duct that restricts airflow, loose hangers that cause sagging, and signs of condensation such as water stains or rust. In homes near wooded parts of Readington, evidence of critters—chewed insulation or gnaw marks—can point to hidden damage inside the duct.
Mark each issue with painter’s tape and brief notes: leak at elbow seam, kinked flex duct, loose boot at bedroom register, missing insulation at the plenum, etc. This list will become your repair roadmap.
Common Repairs and How to Do Them
Leaky seams on sheet-metal ducts: Clean the area with a damp rag to remove dust. Apply a generous layer of mastic over the seam and any screw heads. For larger gaps, embed a piece of fiberglass mesh tape into the wet mastic, then coat again. Alternatively, use UL 181-rated foil tape, pressing firmly and smoothing out to ensure full contact. Do not use cloth-backed household “duct tape” because it degrades in HVAC conditions.
Loose collar connections: Many branches connect to trunk lines with a takeoff collar. If a collar wiggles, resecure it with sheet-metal screws spaced evenly around the flange. Then seal the joint with mastic. Check the inner liner of any attached flex duct and ensure it is tightly zip-tied over the collar and sealed with mastic or UL 181 foil tape before pulling the insulation and outer jacket back over and taping it closed.
Damaged or kinked flex duct: Kinks choke airflow. Gently straighten the run to maintain smooth curves and adequate radius around turns. Replace sections that are torn or badly crushed. When cutting new flex, trim the inner liner first, fit it over the collar, tighten with a zip tie, seal, and then pull the insulation and jacket over the connection. Support long spans with proper hangers every 4 to 6 feet to prevent sagging.
Disconnected boots and registers: At the supply boot (the box connecting duct to the room register), ensure the duct is fully seated and sealed. Where boots pass through floors or ceilings, seal gaps around the boot to the building materials with mastic or appropriate air-sealing foam to prevent conditioned air from leaking into cavities.
Plenum leaks: The plenum is critical because it handles the highest pressure air right at the air handler. Seal all seams and corners with mastic. If insulation is missing or loose, rewrap with appropriate duct insulation and secure seams with foil tape, not cloth tape.
Balancing Airflow After Repairs
Once leaks are sealed and ducts are resecured, you may notice comfort improvements. To optimize results, check airflow at each register. If some rooms still feel weak, verify the path from trunk to boot is free of kinks, sharp bends, or obstructions. Adjust manual dampers if present; these are small levers on branch ducts that modulate airflow. Never close dampers more than necessary, as excessive restriction strains the blower and can cause icing in summer or overheating in winter.
Moisture, Condensation, and Insulation
Readington’s humid summers can lead to condensation on cold ducts in unconditioned spaces. Insulation is the first defense. Make sure all cold air supply lines are fully insulated with intact vapor barriers. If you see persistent moisture or mold, investigate for air leaks that allow humid air to contact cold metal. Seal first, then insulate. Consider adding a dehumidifier in particularly damp basements, and verify attic ventilation is adequate to reduce heat and humidity buildup.
When to Consider Professional Help
DIY repairs are effective for visible, accessible problems. However, hidden breaks behind finished walls, complex zoning issues, or persistent airflow imbalance may require specialized tools and expertise. If you suspect undersized or oversized trunk lines, negative pressure problems, or contaminated ducts, reach out to a trusted Readington provider. Mid-project is often the best time to make that decision, especially if you encounter asbestos-containing insulation, extensive mold, or structural concerns. In those situations, timely professional air duct repair helps prevent further damage and restores system performance safely.
Post-Repair Verification
After completing repairs, run the system and check each previously marked spot. Feel for escaping air, listen for whistling, and confirm that foil tape and mastic have fully adhered. Replace or clean filters to ensure the blower is not starved for air. If you have access to simple measuring tools, a handheld anemometer can help compare relative airflow at registers, while an infrared thermometer can spot excessive temperature losses across long duct runs.
Preventive Maintenance Tips
- Inspect accessible ducts twice a year—before cooling season and before heating season.
- Change or clean HVAC filters regularly to reduce dust buildup and pressure drop.
- Keep storage items off ducts in basements and attics to avoid crushing or punctures.
- Use proper hangers for flex duct and avoid long unsupported spans.
- Recheck mastic and foil tape annually where temperatures and humidity swing widely.
- Seal gaps at boots to building materials to reduce leakage into cavities.
- Address pest entry points around the home to prevent chewing damage.
- Schedule professional duct cleaning only after leaks are sealed, so you don’t pull debris from cavities into the system.
Local Considerations in Readington
Homes in Readington range from historic farmhouses to modern constructions. Older homes may have unconventional chases or transitions added over decades of upgrades, making careful mapping crucial. Photograph each section before and after you work, label branches that feed key rooms, and note damper positions. Newer homes with flex duct can deliver excellent comfort when runs are short, smooth, and well-supported; take extra time to correct sags and kinks common in attic runs.
Advanced Repairs: Metal Patching and Transitions
For small holes in sheet-metal ducts, cut a patch from similar-gauge metal, overlap the hole by at least an inch on all sides, fasten with sheet-metal screws, and seal the perimeter with mastic. For transitions between different duct sizes or shapes, use factory fittings when possible; improvised transitions often leak or create turbulence that robs airflow. When replacing a section, measure twice and dry-fit components before sealing to ensure alignment.
Testing for Leaks Without Special Equipment
While professionals use duct blasters and manometers, you can approximate a check with simple tools. Hold a strip of lightweight tissue or incense smoke near seams while the blower runs; movement indicates leaks. Use a flashlight behind thin foil tape to reveal gaps if light shines through edges. Keep a written log of findings and fixes; it helps track improvements season to season.
Frequently Asked Questions
Q: Is mastic better than foil tape? A: Both are effective if properly rated and applied. Mastic is excellent for rough seams and larger gaps, while UL 181-rated foil tape works well on clean, smooth surfaces and for closing insulation jackets.
Q: Can I use regular duct tape? A: No. Cloth-backed duct tape dries out and fails in HVAC conditions. Use UL 181-rated foil tape and HVAC-grade mastic.
Q: How do I know if a flex duct needs replacement? A: If the inner liner is torn, crushed beyond recovery, or detached from the collar, replacement is best. Minor kinks can be straightened and supported.
Q: What if I find mold? A: Stop work, wear proper protection, and determine the moisture source. Consider professional remediation if growth is widespread or if sensitive individuals live in the home.
Q: Why are some rooms still uncomfortable after repairs? A: You may have design or balancing issues, such as undersized branches or closed dampers. Reevaluate duct sizing or seek a professional assessment.
Q: Do I need to insulate return ducts? A: Returns in conditioned spaces typically do not need insulation, but returns in hot attics or cold basements can benefit to reduce temperature swings and noise.
Q: How often should I reinspect sealed joints? A: Check critical seams annually and after extreme weather. Good mastic joints should last for years when applied to clean surfaces.
Q: Will sealing ducts lower my energy use? A: Yes. Reducing leakage decreases lost conditioned air, easing the load on your HVAC and typically improving comfort substantially.
Get Results You Can Feel in Every Room
With a clear plan, the right materials, and careful workmanship, you can fix the most common duct problems found in Readington homes. Take your time sealing seams, replacing damaged flex, stabilizing hangers, and verifying airflow. If you uncover complex issues or simply want guaranteed results, schedule trusted local help today. Reach out for expert air duct repair and enjoy a cleaner, more comfortable home in every season.
