Why a Dedicated Dryer Vent Matters in Readington, New Jersey
Clothes dryers are convenient, but without a properly designed and installed vent, they can become inefficient, frustrating, and even hazardous. In Readington, New Jersey, where seasonal humidity, chilly winters, and leafy fall conditions all converge, an effective dryer vent system helps move moist, lint-laden air outside while protecting your home from mold, heat buildup, and fire risks. If you are planning dryer vent installation for a new home or are replacing a problematic setup in an older property, taking a methodical, code-informed approach will safeguard your household and improve day-to-day laundry performance.
This guide explains the fundamentals of dryer vent design, route planning, materials, tools, safety checks, and long-term maintenance tailored to Readington homes. Whether you are coordinating with a builder during a remodel or evaluating a do-it-yourself path in a single-family house, the information here will help you avoid common mistakes and keep your dryer running efficiently year-round.
How Dryer Vents Work: The Basics
A dryer removes moisture from clothes by tumbling them in heated air. That air becomes saturated with water vapor and lint fibers, which must be exhausted outdoors. The vent system provides a sealed, low-resistance pathway for the dryer’s blower to push that air outside. A well-installed vent protects indoor air quality, keeps walls and insulation dry, and prevents lint accumulation inside the home’s envelope.
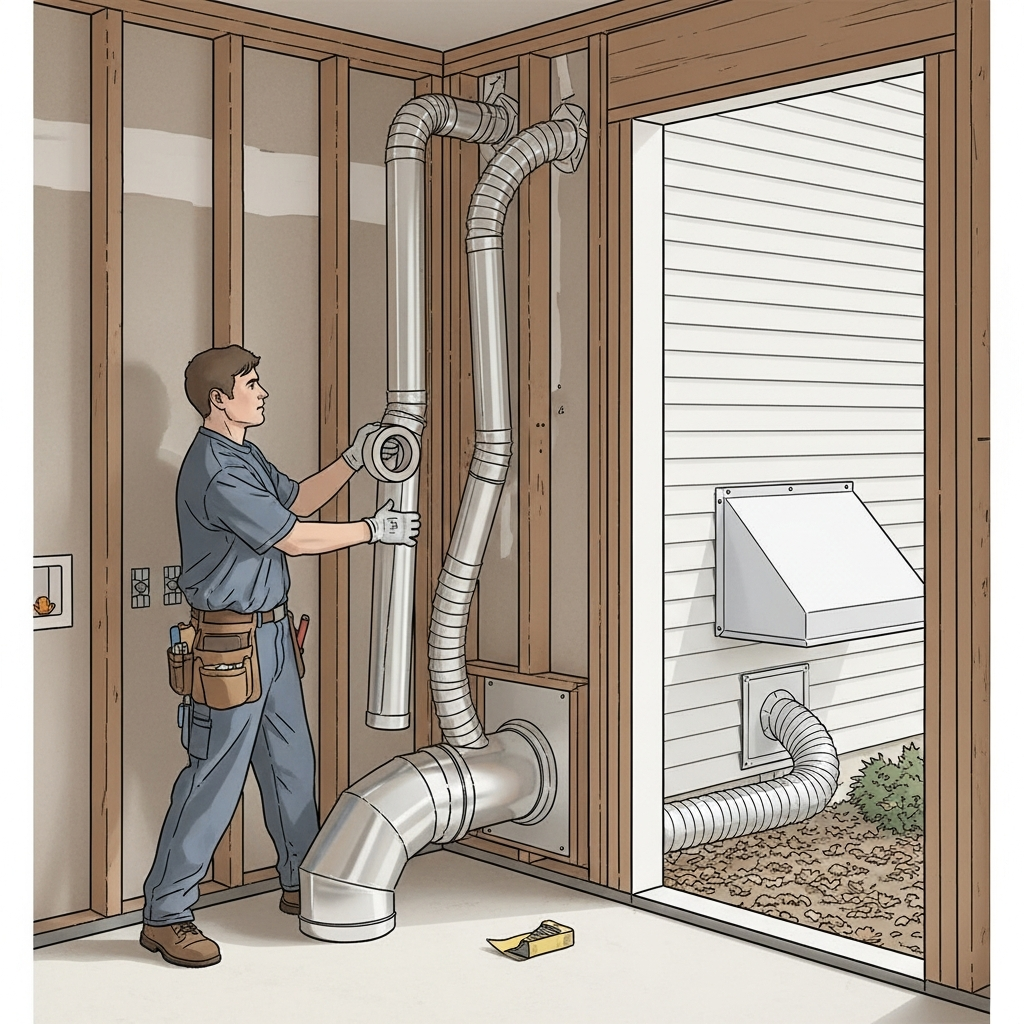
- Exhaust duct: The rigid metal tubing that carries moist air from the dryer to the outdoors.
- Transitions and elbows: Short components that connect the dryer outlet to the main run and help navigate turns.
- Exterior termination: The outside cap or hood with a damper that prevents backdrafts and pest intrusion.
- Support elements: Straps and clamps that hold sections securely and keep slopes consistent.
- Safety clearances: Spacing from combustibles and proper routing to avoid concealed or hazardous paths.
When the vent path is short, smooth, and properly sloped, the dryer works less to move air. That means faster drying, lower energy use, and dramatically reduced lint accumulation within the duct.
Planning the Vent Route in a Readington Home
Route planning is the foundation of a safe installation. Every foot of duct and every elbow adds resistance, so shorter and straighter is always better. In Readington’s varied housing stock—from mid-century ranch homes to two-story colonials and modern additions—consider the most direct wall or roof exit that protects the envelope and respects code limits.
- Confirm dryer location: The dryer should sit close to an exterior wall when possible to limit duct length.
- Identify exit options: A sidewall termination is typically simpler than a roof termination and easier to maintain.
- Minimize elbows: Each 90-degree elbow adds resistance equivalent to several feet of straight duct.
- Avoid concealed cavities: Do not vent into attics, crawlspaces, garages, or indoors; air must discharge outside.
- Plan for accessibility: Ensure future cleaning and inspection points are reachable without invasive demolition.
In older Readington homes with thick masonry or stone, you may need a masonry bit and careful drilling to create a clean exit. In newer framed walls, verify stud and utility locations to avoid electrical or plumbing conflicts.
Recommended Materials for Long-Term Safety
Materials matter. Certain flexible or plastic ducts are not appropriate for long-term dryer venting because they snag lint and can overheat. Prioritize smooth, rigid metal ducts rated for dryer exhaust applications.
- Rigid metal ducting: Galvanized or aluminum duct sections with smooth interiors are preferred.
- Metal elbows: Use adjustable elbows with gentle curves rather than tight flex bends.
- Short, UL-listed transition: A short, UL-listed flexible connector at the dryer outlet may be allowed; keep it as short and straight as possible.
- Exterior hood with backdraft damper: Choose a hood that limits pest entry and closes tightly when the dryer is off.
- Metal foil tape: Seal joints with approved foil tape rated for ductwork; avoid screws protruding into the airstream.
- Support straps: Secure long runs to prevent sagging and maintain proper slope toward the dryer.
Avoid thin plastic or vinyl flexible ducts entirely. These can melt, burn, or trap lint quickly, undermining safety and performance.
Tools and Prep Checklist
Preparing your workspace ensures the installation proceeds efficiently and safely.
- Measuring tape, level, and marker
- Drill with hole saw or masonry bit (for wall penetration)
- Tin snips and crimping tool
- Screwdriver and nut driver
- Foil duct tape rated for HVAC use
- Exterior sealant appropriate for siding or masonry
- Protective equipment: gloves, safety glasses, and dust mask
Clear the laundry area, unplug the dryer, and, for gas dryers, shut off the gas supply before moving the unit. Protect finished floors and walls with drop cloths as needed.
Step-by-Step Overview
- Measure the route: Map the straightest path with the fewest elbows to the chosen exterior wall.
- Cut the exterior opening: Drill a pilot hole, then create a clean, level penetration sized for the termination hood.
- Install the exterior hood: Fit the hood from outside, seal the perimeter against weather, and fasten securely.
- Dry-fit duct sections: From the interior, assemble rigid sections and elbows to reach the hood with minimal joints.
- Seal and secure: Crimp male ends in airflow direction, seat into female ends, and seal with foil tape. Strap longer runs.
- Connect the dryer: Use a short, UL-listed transition between the dryer outlet and rigid duct. Keep it straight and supported.
- Test airflow: Run the dryer on air-fluff; check for strong airflow at the exterior hood and listen for rattles.
- Final checks: Verify clearances, slope, and that the hood damper opens freely without obstructions.
Work deliberately. Every smooth joint and supported section you add now reduces future lint buildup and maintenance frequency.
Readington Climate and Building Considerations
Readington’s seasonal swings influence vent performance. Humid summers load exhaust air with moisture; cold winters make exterior dampers prone to sticking if lint accumulates or if condensation freezes. An exterior hood with a durable damper and periodic cleaning is essential. If your home has older cedar or newer vinyl siding, choose a termination designed to seal well and shed water. For stone or brick facades found in some neighborhoods, take extra time sealing the perimeter to prevent water ingress.
Homes with long interior runs—such as laundry rooms in the center of a colonial floor plan—require careful planning to remain within effective length limits. In these cases, reducing elbow count and considering slightly larger duct diameters (where code and manufacturer guidance allow) can help maintain airflow. Avoid adding screens at the exterior hood; they clog rapidly with lint.
Common Installation Mistakes to Avoid
- Using plastic or thin foil ducts that collapse or trap lint
- Excessive elbow use creating high static pressure
- Long, unsupported runs that sag and pool lint
- Terminating into attics, crawlspaces, or garages rather than outdoors
- Fastening joints with screws protruding into the airstream
- Skipping the airflow test after installation
- Neglecting periodic cleaning and lid/damper inspections
Avoiding these pitfalls pays off immediately in shorter dry times and lower fire risk.
Improving Safety and Efficiency
Safety is more than a one-time installation task; it involves maintenance and operating habits.
- Clean the lint filter before every load to support airflow.
- Inspect and clean the vent at least annually, or more often with heavy usage or long runs.
- Keep the area behind the dryer free of kinks and crushing forces.
- Verify the damper opens fully during operation and closes when off.
- Use appropriate heat settings and avoid overloading the dryer.
- For gas dryers, ensure proper combustion air and check for exhaust odor issues.
When these practices become routine, the system performs reliably through Readington’s seasons.
When DIY Makes Sense—and When It Does Not
Homeowners with moderate DIY experience and accessible wall exits can often complete a straightforward installation. If the route is short and materials are readily available, you can achieve excellent results with careful planning and testing. However, complex routes, concealed spaces, multi-story runs, or upgrades that interact with other systems—like adding fire-stopping, rerouting utilities, or penetrating masonry—are best handled by experienced technicians who understand both local code expectations and manufacturer specifications.
If you are uncertain about effective length limits, air pressure, or best practices for a particular dryer model, professional guidance can prevent missteps and rework. Midway through a project is also a fine time to ask for help, especially if you discover previously hidden obstacles or insufficient airflow during testing. A qualified pro can evaluate your route, verify materials, and confirm that your installation aligns with safety standards and local expectations. Many Readington homeowners choose to consult or hire for the final connection and airflow testing to ensure everything functions as intended. For specialized assistance and route optimization, consider scheduling professional dryer vent installation to resolve complex layouts and improve performance.
Maintenance and Ongoing Care in Readington
After installation, commit to a maintenance routine. Seasonal yard debris, birds, and windblown leaves can affect exterior hoods. High pollen periods in spring and lint accumulation through heavy laundry cycles both necessitate more frequent checks. In many homes, an annual cleaning suffices; for larger families or longer runs, semiannual inspections may be better. Document each cleaning and note any performance changes, like longer drying times or elevated appliance surface temperatures. These are early signs of airflow restriction.
Inside the laundry room, maintain a clean, uncluttered space. Keep boxes and storage bins away from the dryer’s air intake and the vent connection. During deep cleans, gently pull the dryer forward to inspect the transition connector for kinks or crushing. Replace worn or damaged connectors promptly with a UL-listed transition of the shortest feasible length.
Troubleshooting Performance Problems
If clothes take too long to dry, feel excessively hot, or the dryer exterior becomes unusually warm, suspect airflow issues first. Check the lint filter, inspect the transition, and step outside to watch the damper while the dryer runs. A weak or barely opening damper suggests a blockage or excessive resistance. Verify that no recent renovations blocked the route and that elbows have not shifted.
Burning smells, scorching on the dryer cabinet, or visible lint accumulation near the termination require immediate attention. Shut off the dryer, disconnect power, and investigate the vent. Do not continue operating the unit until the cause is resolved. In older homes with previous noncompliant materials, replacing the entire vent with rigid metal can dramatically improve safety and efficiency.
Frequently Asked Questions
Q: Can I use the same vent for my bathroom fan and my dryer? A: No. Dryer vents must be dedicated to the dryer alone. Combining exhaust systems creates moisture and lint hazards and violates common code provisions.
Q: How often should I clean the dryer vent? A: At least annually for most Readington households; more often for longer runs, large families, or heavy laundry routines. Seasonal checks of the exterior hood are also wise.
Q: Is foil tape acceptable on joints? A: Yes, use metal foil tape rated for HVAC ducts. Do not use cloth-backed duct tape, which degrades quickly. Avoid screws protruding into airflow; they snag lint.
Q: Does a longer run mean I need a booster fan? A: Only if permitted by code and the dryer manufacturer, and typically after exhausting all options to reduce run length and elbows. Many residential installs should not require boosters if designed efficiently.
Q: Should I terminate the vent on the roof? A: Wall terminations are often simpler and easier to maintain in Readington’s climate. Roof terminations can work if installed correctly and maintained, but they add height, potential leakage points, and access challenges.
Q: What are the signs of a dangerous setup? A: Melted or crushed flexible ducts, excessive lint around the dryer, hot-to-the-touch dryer surfaces, moisture on nearby walls, and a stuck exterior damper all signal trouble.
Q: Are there special considerations for gas dryers? A: Yes. Ensure adequate combustion air, maintain clearances, and verify that all exhaust is vented outdoors. If you smell gas or suspect improper venting, stop using the dryer and seek help.
Local Insights for Readington Homeowners
Readington’s mix of suburban neighborhoods, historic properties, and rural parcels means no two installations are quite the same. Older homes may have structural elements that complicate straight-line routes, while newer builds may have laundry rooms placed centrally for floor plan efficiency. Plan proactively for accessibility so that future inspections and cleanings are straightforward. Seasonal yard care can also affect terminations—trim shrubs and keep mulch pulled back from the hood to prevent obstructions and pest harborage.
If your home experiences frequent power outages or you rely on backup generators during storms, ensure the dryer circuit and vent remain safely installed and easily accessible. After major weather events, a quick exterior hood check can prevent headaches when laundry day returns.
Putting It All Together
A safe, efficient dryer vent installation is the product of good planning, appropriate materials, careful assembly, and consistent maintenance. When done correctly, your dryer runs smoothly, laundry times shrink, and the risks associated with trapped lint and moisture diminish dramatically. The result is a quieter, more efficient laundry room and greater peace of mind through Readington’s changing seasons.
Ready to Improve Your Home’s Safety and Efficiency?
If you want a second set of eyes on your route planning, need help penetrating masonry, or simply prefer a smooth, code-aware install that maximizes airflow from day one, reach out to a local specialist. Schedule dependable dryer vent installation services and enjoy faster drying, reduced maintenance, and a safer home in Readington, New Jersey.
