Understanding the Dryer Vent Installation Process in Readington
Installing a dryer vent the right way is a step-by-step endeavor that balances airflow, safety, and compliance with building best practices. In Readington, New Jersey—where winters are cold, summers humid, and fall foliage can clog exterior openings—getting the process correct from the start prevents moisture problems, lint accumulation, and fire risks. This walkthrough explains each phase, from planning the route to testing the final assembly, so you can visualize how a reliable system comes together. If you are researching the dryer vent installation process for a remodel or a new appliance, the steps below will help you understand what to expect and how to prepare.
Before a single hole is drilled, successful installs begin with clear goals: shortest route, fewest bends, and durable, code-aligned materials. The objective is to create a smooth, low-resistance path that delivers strong airflow to the outside while remaining serviceable for future cleaning.
Phase 1: Assessment and Planning
Every home is different. A laundry room tucked against an exterior wall in a Readington ranch presents a straightforward path; a centrally located laundry in a two-story colonial requires careful routing to keep the effective length manageable. Begin with an assessment of constraints and opportunities.
- Appliance specification: Note the dryer outlet location, diameter, and manufacturer guidance on maximum vent lengths.
- Building features: Identify studs, joists, plumbing, and electrical that can interfere with the path.
- Exterior options: Choose a wall termination when practical; roof terminations demand more weatherproofing and access for maintenance.
- Maintenance access: Plan for future cleaning, especially if the route includes concealed segments.
Create a simple drawing or notes documenting proposed route length and number of elbows. Each 90-degree elbow adds significant resistance; replacing with two 45-degree bends can help in tight spaces.
Phase 2: Materials and Tools
Material selection directly impacts performance. Smooth, rigid metal ducting is the gold standard for dryer vents. Flexible plastic, thin foil, or accordion-style ducts trap lint and degrade over time.
- Rigid aluminum or galvanized steel ducts in appropriate diameter
- Adjustable metal elbows (prefer gentle curves where possible)
- Short, UL-listed transition connector from dryer to rigid run
- Exterior hood with backdraft damper sized to match duct diameter
- Foil HVAC tape for air-sealing joints; avoid screws intruding into the airstream
- Support straps or hangers to prevent sagging
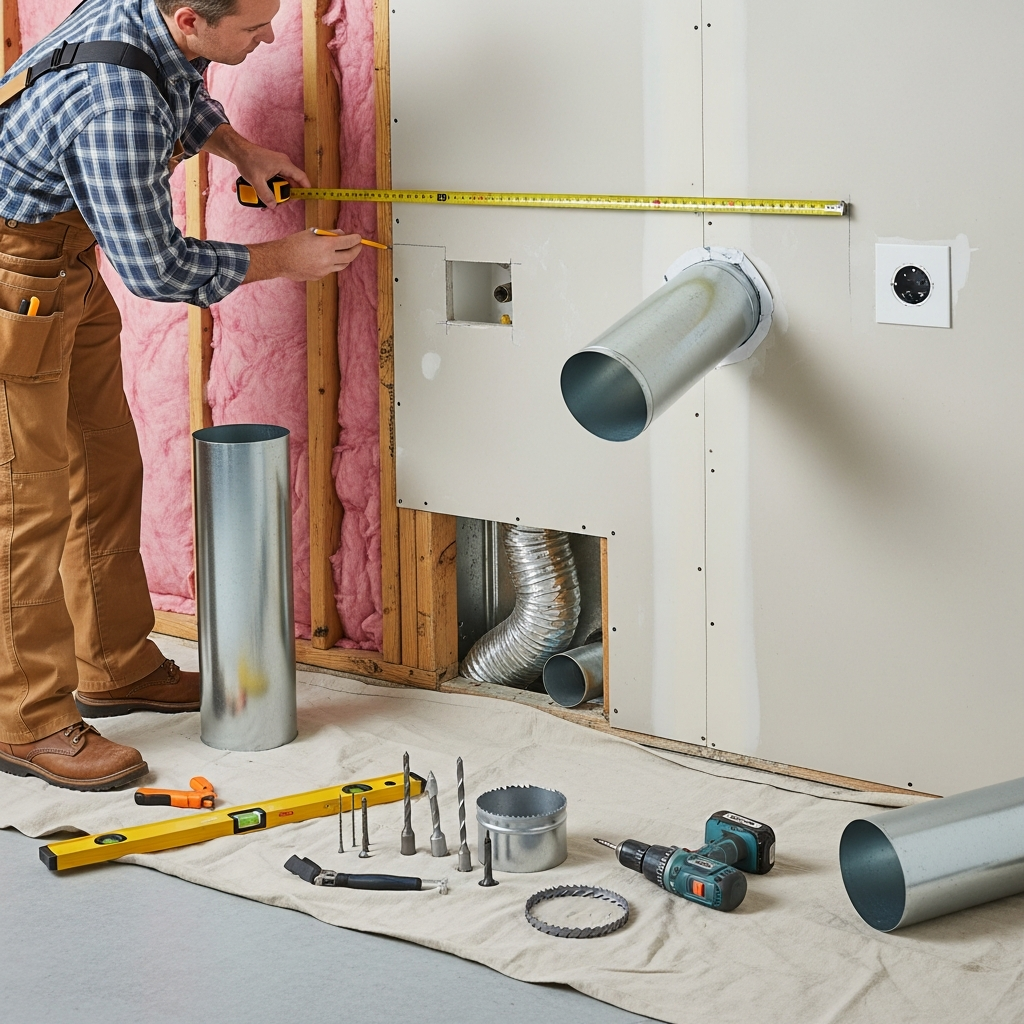
Common tools include a drill with hole saw or masonry bit, tin snips, crimping tool, level, measuring tape, and safety gear. For stone or brick exteriors common in some Readington neighborhoods, a masonry core bit may be necessary.
Phase 3: Site Preparation
Clear the laundry area and disconnect the dryer. For gas units, shut off the gas and cap the line per best practices. Protect floors and nearby finishes. Mark the route on walls or framing members to visualize how each segment fits together, ensuring minimal interference with other systems. Identify an exterior location that allows the damper to open fully without striking shutters, shrubs, or downspouts.
Inside the wall cavity, verify that insulation and vapor barriers remain properly configured after the penetration. A clean, snug opening—sealed with appropriate exterior-grade sealant—will protect the building envelope from moisture.
Phase 4: Cutting and Installing the Exterior Termination
From the interior, drill a pilot hole centered at the planned exit. Confirm alignment outside before enlarging the opening. Use a hole saw or masonry bit sized to the termination collar. Insert the termination hood from the exterior, ensure a slight downward pitch to shed water, and fasten according to the manufacturer’s instructions. Seal the perimeter with a weather-appropriate sealant compatible with your siding or masonry.
A quality exterior termination with a reliable damper is critical in Readington’s climate. Leaves, wind, and winter precipitation can stress flimsy covers; invest in a robust design that will not clog easily and remains serviceable.
Phase 5: Assembling the Interior Duct Run
With the termination in place, dry-fit the duct segments from the interior to create the smoothest path. Orient the crimped ends in the direction of airflow (toward the exterior) to reduce lint catch points. Limit the number of elbows and maintain gentle curves. Where necessary, use supports to hold runs level and free from dips that could collect lint or condensation.
- Measure twice, cut once: Use tin snips for precise cuts; deburr edges.
- Crimp and seat: Ensure male ends insert fully into female ends.
- Tape and seal: Apply foil HVAC tape to all circumferential joints; do not rely on friction alone.
- Support regularly: Strap long horizontal runs to prevent sagging and maintain consistent slope.
Keep joints visible where possible. Accessible joints make future cleaning and inspection much easier—a worthwhile consideration as your household’s laundry volume fluctuates throughout the year.
Phase 6: Connecting the Dryer
Position the dryer so that the outlet aligns with the duct connection. Use a short, UL-listed transition connector only as long as needed and avoid crushing it as you slide the dryer back into place. The transition should be straight and supported; sharp bends behind the dryer significantly reduce airflow and invite lint accumulation.
For gas dryers, ensure the gas line is routed safely and check for leaks after reconnection following manufacturer guidelines. Confirm the power supply is adequate and cords are secured away from hot surfaces.
Phase 7: Testing and Adjusting
Before you declare the job complete, test airflow thoroughly. Run the dryer on an air cycle and confirm strong airflow at the exterior hood. Watch the damper open fully and close smoothly when the cycle ends. Listen for rattles indicating loose joints or vibrating sections that need additional support. Inside, verify that the dryer operates without unusual heat buildup or extended cycle times.
If airflow is weak, inspect for hidden kinks, elbows out of alignment, or joints not fully seated. Check the effective length against your dryer’s recommendations. When in doubt, seek professional evaluation to avoid premature wear and safety hazards. In complex layouts or retrofits, timely guidance can prevent expensive rework. When you would prefer a professional to complete or verify the work, consider expert dryer vent installation to confirm performance and compliance.
Special Considerations for Readington Homes
Readington homeowners contend with a full four-season climate. During winter, a long, poorly insulated interior run can experience temperature differentials that encourage condensation. While you should not insulate the duct itself in most cases, ensure the building penetration is well sealed to prevent drafts. In summer, humidity elevates the moisture load; this makes strong airflow even more important to avoid interior dampness.
Exterior landscaping matters too. Keep shrubs, mulch, and decorative elements clear of the termination so the damper can operate freely and lint does not build up in crevices. After fall leaf drop and spring pollen peaks, inspect and clean the hood to maintain peak performance.
Common Pitfalls and How to Avoid Them
- Using plastic or non-rated flex duct: These slump, trap lint, and pose fire risks.
- Too many elbows: Each bend reduces airflow; redesign the route to minimize turns.
- Screws in the airstream: Fasteners protruding into the duct snag lint; rely on crimping, tape, and proper fittings.
- Hidden terminations: Never vent into attics, crawlspaces, or garages; always discharge outdoors.
- Neglecting the final test: A quick airflow check outside can reveal issues immediately.
A process mindset—plan, assemble, test, adjust—helps avoid these traps and yields a safe, efficient vent.
Maintenance After Installation
The installation process ends, but home care continues. Clean the lint screen before each load. Schedule vent cleaning annually or semiannually depending on usage. Watch for telltale signs of restriction: hot dryer surfaces, burning smells, or longer dry times. In Readington’s windy seasons, add a quick visual inspection of the exterior hood to your yardwork routine.
Document maintenance dates and any changes you make, such as replacing a transition connector or adjusting support straps. A simple record helps you track performance trends and anticipate service needs.
Frequently Asked Questions
Q: How long can a dryer vent be? A: It depends on the dryer model and the number/type of elbows. Manufacturers specify maximum effective lengths. Keeping runs short and minimizing bends is key.
Q: Can I vent the dryer through the roof? A: Yes, but wall terminations are often easier to maintain in Readington. Roof terminations require meticulous flashing and may be harder to clean.
Q: What tape should I use on joints? A: Use metal foil HVAC tape rated for ducts. Cloth-backed duct tape fails quickly under heat and humidity.
Q: Do I need a booster fan? A: Only if the route is exceptionally long and allowed by both code and the dryer manufacturer. First, redesign to shorten and straighten the run.
Q: How often should the vent be cleaned? A: At least once per year for most households; more often for long runs or heavy laundry usage.
From Start to Finish: Confidence in the Process
When you respect each phase—planning, material selection, precise assembly, and thorough testing—you end up with a vent that performs reliably and safely. The extra care you invest now saves time and headaches later, especially through Readington’s changing seasons.
Take the Next Step Toward a Safer, Faster-Drying Laundry
If you want validation that your design will deliver strong airflow, or prefer a hands-off approach with expert testing and finishing, book trusted dryer vent installation in Readington and enjoy efficient drying, cleaner indoor air, and confidence that your vent is built to last.
