Introduction: Why Air Duct Installation Steps Matter in Readington, New Jersey
Whether you are upgrading an older HVAC system or building a new addition, getting the steps of air duct installation right is essential for indoor comfort, energy efficiency, and long-term reliability. In Readington, New Jersey, local climate shifts from humid summers to chilly winters demand duct systems that deliver consistent airflow without leaks, hot or cold spots, or loud operation. If you are planning a project—whether DIY with professional oversight, or fully pro-managed—understanding each stage helps you communicate clearly with technicians, set realistic timelines, and prepare your home for a smooth install. If you already know you want a specialist-led solution, consider a local team experienced in air duct installation to ensure your system is designed and built to code from the start.
Below is a clear, step-by-step walkthrough tailored to Readington homes. It covers planning, duct design, material selection, installation techniques, sealing, testing, and final handoff—along with guidance on local best practices and common pitfalls.
Step 1: Pre-Installation Planning and Home Assessment
Every successful duct system begins with a thorough assessment. A technician evaluates your home’s layout, construction type, insulation levels, and the location of the air handler and return grills. They will look for existing chases or soffits, attic accessibility, and basement or crawlspace conditions common to Readington properties. This planning stage confirms where supply registers and return grills can go without compromising structural framing, fire safety, or maintenance access.
Accurate room-by-room square footage, window orientation, and ceiling height are documented. Any special usage rooms—like a home office, gym, or nursery—are flagged for enhanced comfort needs. The goal is to minimize long runs, sharp turns, and cramped placements that add static pressure and waste energy.
Step 2: Load Calculations and Duct Sizing
With the home assessment complete, a professional performs heating and cooling load calculations. These calculations determine how much conditioned air each room needs. Correct sizing is critical: undersized ducts starve rooms of airflow, while oversized trunks can be noisy and inefficient. The installer also accounts for duct material (metal, flexible, or rigid fiberglass), the number of elbows, and the total equivalent length, which all influence system resistance.
In Readington, where winter drafts and summer humidity collide, proper return air sizing is as important as supply sizing. Balanced return placement prevents pressure imbalances that cause whistling doors, drafts, and poor temperature control.
Step 3: Selecting Materials and Components
Choosing high-quality components reduces noise, leakage, and future maintenance. Rigid sheet metal is often used for main trunks due to its durability and low friction. Insulated flexible ducts may be used for short branches where accessibility is limited and sharp bends are required. Your installer will select appropriate insulation thickness for attic or unconditioned spaces to reduce temperature loss and prevent condensation.
Other key components include properly sized takeoffs, manual dampers for balancing, mastic and UL-listed foil tape for sealing, vibration isolators near the air handler, and sturdy hangers or supports that prevent sagging. Quality supply registers and returns with adjustable dampers help fine-tune comfort room by room.
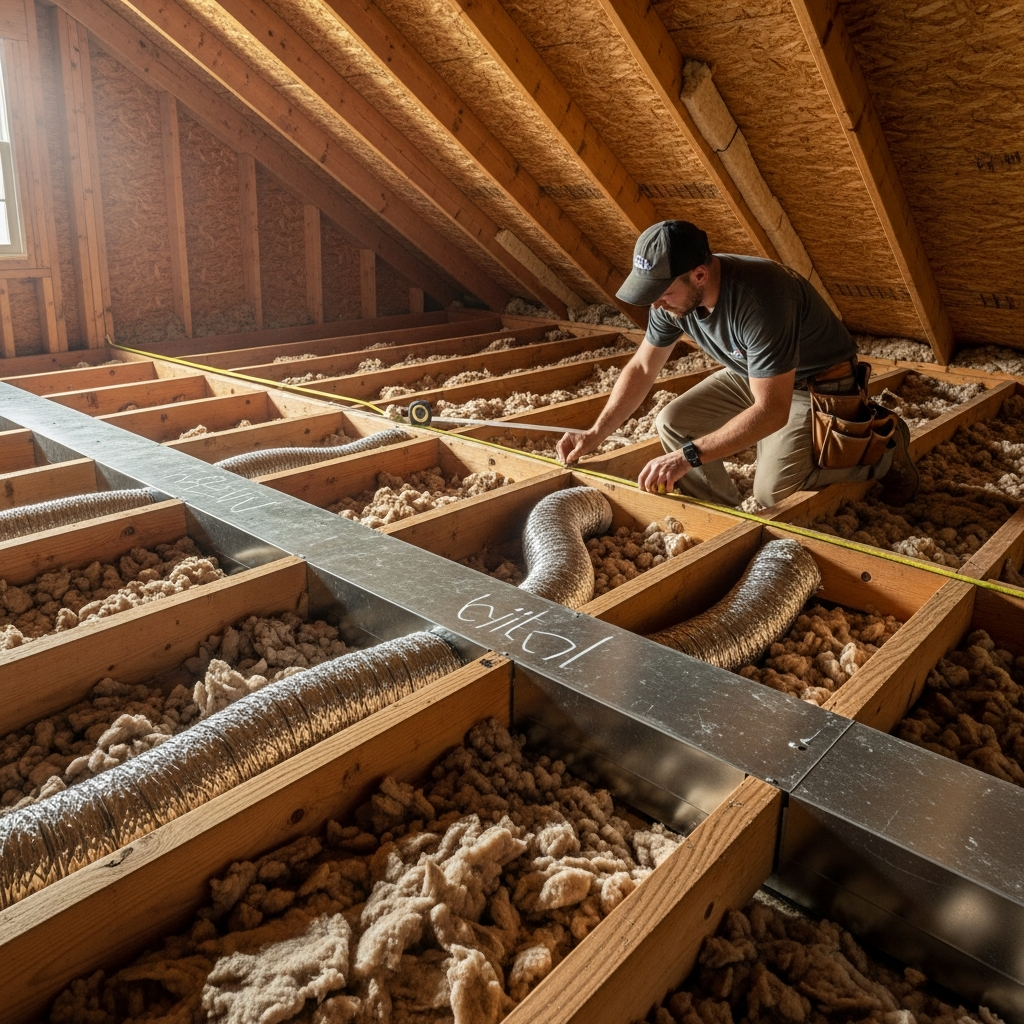
Step 4: Layout Marking and Cutouts
On installation day, the team lays out the trunk and branch paths, marks joists or studs to avoid, and confirms final register locations. Precision cutouts are made for boots and returns, making sure they align with finished flooring or drywall. When working in basements common to Hunterdon County homes, installers confirm clearance from plumbing and electrical runs and verify that access panels are not obstructed.
To maintain structural integrity, installers avoid cutting load-bearing members and follow fire-blocking requirements. They also plan pathways that simplify service access to filters, dampers, and the air handler.
Step 5: Trunk and Branch Installation
The main trunk line is installed first, starting near the air handler. Straight runs are preferred, with gentle sweeps instead of tight elbows. Branch lines are then tapped into the trunk using takeoffs sized for the target airflow. Each branch run is routed as directly as possible to its register, with lengths kept short and kinks avoided.
If flexible duct is used, it is kept taut and supported at proper intervals to prevent sagging, which can cause airflow reduction and noise. Where rigid duct is used, joints are carefully fitted and crimped in the direction of airflow to minimize turbulence. Installers confirm that each boot is square, level, and secured to framing for a tight connection to grilles.
Step 6: Sealing, Insulating, and Supporting
Air leakage robs comfort and efficiency. Installers meticulously seal all joints, seams, and takeoffs with mastic. UL-listed foil tape may be used where appropriate, but cloth duct tape is never a substitute for approved sealants. In unconditioned spaces, ducts are insulated per energy code and wrapped without compressing the insulation, which would reduce effectiveness.
Proper supports and hangers are critical. In attics, ducts are elevated above insulation when required and protected from sharp edges. In basements, hangers keep ducts level and maintain the specified slope for any condensate-sensitive runs. Balanced supports prevent vibration and rattling during system operation.
Step 7: Register Placement and Return Air Strategy
Supply registers are positioned to promote mixing and minimize drafts, often along exterior walls or near windows. Return grills are placed to pull air effectively across the room and back to the air handler. A central return might suffice in smaller homes, but multiple returns can improve comfort in larger or multi-level layouts common across Readington’s housing stock.
Adjustable dampers are set to balance airflow across rooms. High and low return strategies can help in seasonal transitions, moving warm or cool air more effectively based on temperature stratification.
Step 8: System Balancing and Performance Testing
Once installed, airflow is measured and balanced. Technicians use manometers and anemometers to verify static pressure and CFM delivery to each room. If a room is underperforming, the team checks for kinks, constrictions, or undersized branches and makes adjustments. Noise issues are addressed by adding turning vanes, adjusting airflow, or improving support and isolation near the air handler.
Leak testing confirms that sealing is robust. The goal is to keep conditioned air inside the system, not bleeding into attics or basements where it provides no comfort benefit. A tight system reduces energy waste, improves humidity control, and extends equipment life.
Step 9: Code Compliance, Safety, and Local Considerations
Readington projects must respect applicable building and mechanical codes, along with any township-specific requirements. This includes fire safety, combustion air considerations for fuel-burning appliances, clearances to flues, and proper sealing of penetrations between conditioned and unconditioned spaces. When in doubt, engage a contractor familiar with local inspectors and best practices.
Before final close-up of walls or ceilings, any required inspections should be completed. Proper labeling of dampers and access points simplifies later service and ensures the system remains maintainable.
Mid-Project Checkpoints and Communication
Successful installations are collaborative. Homeowners should expect midpoint walk-throughs to confirm register locations, verify noise expectations, and review any surprises behind walls or in ceilings. If you are uncertain about a design choice—such as moving a return or adding a dedicated supply to a bonus room—now is the time to discuss it. For homeowners who prefer turnkey support, a Readington-based team experienced in ductwork installation service can coordinate design, permitting, installation, balancing, and post-install follow-up.
Common Pitfalls and How to Avoid Them
Rushing layout: Skipping careful layout often leads to cramped turns and long, resistive runs. Insist on a clear, documented plan.
Improper sizing: Oversized or undersized ducts cause noise, inefficiency, and uneven temperatures. Always rely on load calculations, not guesswork.
Poor sealing: Unsealed joints leak air where it does no good. Mastic-sealed joints are a must, especially in unconditioned spaces.
Support issues: Sagging ducts and loose hangers reduce airflow and invite noise. Follow spacing recommendations for supports.
Insulation gaps: Exposed ducts in hot or cold zones lose energy and can sweat. Proper insulation and vapor barriers mitigate these issues.
Ignoring returns: Undersized or poorly placed returns restrict system breathing. Balance supply and return strategies for best results.
Care and Maintenance After Installation
Once your ducts are in place and balanced, maintenance keeps the system efficient. Replace or clean filters at the recommended interval for your equipment. Keep supply registers and returns free of furniture or drapery. If you notice room-to-room imbalances, have a technician verify damper settings and inspect for new obstructions.
Seasonal checkups help confirm the system remains tight, supports are holding, and insulation is intact. Over time, minor adjustments ensure the duct system continues delivering the comfort you expect through Readington’s changing seasons.
Frequently Asked Questions
Q: How long does a typical duct installation take in an occupied home? A: Timelines vary with home size and accessibility. Projects may range from a few working days to longer if complex retrofits or inspections are involved. Clear staging, preparation, and midpoint reviews can help keep schedules smooth.
Q: Can I reuse existing ducts? A: Reuse is possible if ducts are in good condition, correctly sized, well-sealed, and meet current code and performance goals. Many retrofits still benefit from partial replacement or reconfiguration.
Q: What materials are best? A: Rigid galvanized sheet metal is durable and low friction for trunks, while short insulated flex runs can be effective for branches in tight spaces. The right mix depends on design and accessibility.
Q: How do I know airflow is correct? A: Professional balancing with instruments confirms each room receives the intended CFM. Technicians also check static pressure to verify the system runs within manufacturer specifications.
Q: Will new ducts reduce noise? A: Yes, proper sizing, smooth routing, vibration isolation, and balanced airflow typically reduce noise compared to aging, leaky, or poorly designed systems.
Next Steps for Your Readington Home
If you are ready to translate this step-by-step roadmap into a comfortable, efficient home, schedule a consultation to review your layout, load needs, and access points. A specialist can confirm sizing, material choices, and sealing methods appropriate to your space and coordinate inspections so the project stays on track. For a streamlined experience from assessment through balancing, connect with a local expert in Readington air duct installation and enjoy better airflow, quieter operation, and year-round comfort.
