Know the Process Before You Begin
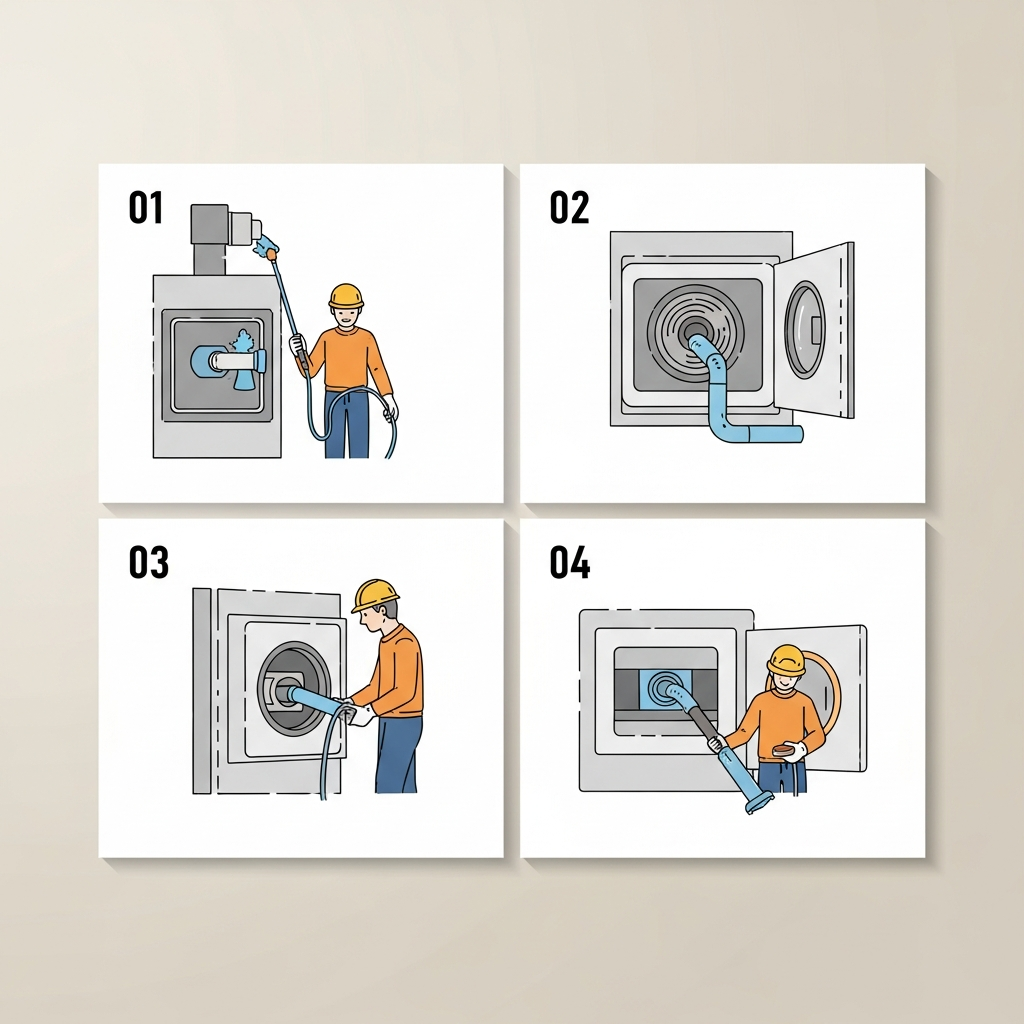
Understanding the step-by-step process for dryer vent cleaning helps you anticipate what will happen during an appointment and why each stage matters. A clear sequence ensures that every section of the vent—from the dryer connection to the exterior termination—receives attention. It also prevents partial cleanings that leave behind hidden lint and performance problems. For Readington homeowners, a well-executed process reflects the realities of local home layouts, seasonal humidity, and a mix of older and newer construction styles. Partnering with a local professional for comprehensive dryer vent cleaning ensures the right tools and techniques are applied in the right order for consistent results.
Below is a detailed walkthrough of each phase, from the initial assessment to final verification. While some steps may vary depending on your home’s configuration, the core principles remain the same: protect the home, clear the entire air path, confirm airflow, and share practical guidance for maintaining performance between visits.
Step 1: Initial Assessment and Safety Preparation
Every effective cleaning begins with an evaluation. The technician reviews where your dryer sits, traces the likely path of the vent, and identifies the location of the exterior hood. They take note of accessibility challenges such as tight closets, stacked units, or roof terminations. This planning stage sets expectations for tools, time, and protective measures.
Next comes site protection. Drop cloths and furniture pads safeguard floors and adjacent surfaces as the dryer is moved. Power may be disconnected briefly if needed for safety. The professional also explains the process so you know how the visit will unfold. Good communication at this stage prevents surprises and helps you understand why certain steps—like temporarily moving the appliance—are necessary.
Step 2: Disconnecting and Inspecting the Transition
With the area protected, the dryer is carefully pulled forward to access the transition connector. In many homes, this connector is a weak link for airflow. Thin foil or plastic can kink easily, flatten behind the appliance, or develop damage where it meets the dryer outlet. The technician checks for crushing, sharp bends, and lint pockets. If an upgrade to rigid or semi-rigid metal is recommended, you will hear why: these materials hold their shape, resist kinks, and maintain a smooth interior for better flow.
During this step, an initial lint removal may occur around the dryer outlet and inside reachable sections. Capturing loose debris early reduces the chance of spreading dust when the deeper cleaning begins. The goal is to set the stage for a controlled, efficient process.
Step 3: Mapping the Vent Path
Effective cleaning relies on understanding the vent’s full geometry. The technician identifies every elbow, vertical rise, horizontal span, and transition through walls, ceilings, attics, or crawl spaces. With a clear mental map, they select the right combination of flexible rods and rotary brushes. This planning avoids pushing lint into remote pockets and ensures that agitation and suction work together to extract debris rather than simply relocate it.
In Readington homes, vent routes vary widely. Short runs in first-floor laundry rooms often clean quickly, while longer paths from upper-floor closets may require multiple access points and tailored tool selection. Regardless of length, mapping ensures nothing is left to chance.
Step 4: Agitation and Controlled Extraction
Now the core cleaning begins. Using specialized brushes sized to the duct, the technician agitates lint along the interior surfaces while a high-powered vacuum captures debris. The rods navigate elbows and long sections, carefully advancing to avoid compacting lint. Progress is measured by both tactile feedback and periodic airflow checks.
Exterior terminations receive attention as well. The hood is cleaned, the damper’s swing is verified, and any obstructions like nesting materials are removed. The objective is to restore a clear, continuous airway from the dryer outlet to the open air.
Step 5: Mid-Process Verification
Professional cleaning is not just about running tools; it is about verifying results as you go. Midway through, a technician may perform a quick airflow or pressure check to confirm that blockages are breaking free and that extraction is effective. If resistance remains high, the plan is adjusted—using different brush sizes, additional passes, or alternate access points. This adaptive approach ensures the job is complete the first time.
At this stage, technicians also watch for telltale signs of structural issues: a sag in an attic run that catches moisture, a joint that was never properly sealed, or an unnecessary elbow that adds resistance. These observations inform recommendations that follow the cleaning.
Step 6: Transition Upgrades and Fit Corrections
Once the duct interior is clear, attention returns to the transition at the dryer. If the existing connector is kink-prone or damaged, replacing it with a semi-rigid or rigid metal option often pays immediate dividends. The dryer is positioned to allow a smooth, sweeping curve rather than a sharp bend. Clamps or connectors are secured so there are no air leaks or loose joints. These fit corrections protect the investment you have just made by preventing premature lint buildup in the first few feet of the system.
In homes where the vent line was routed with an unnecessary elbow, a minor reconfiguration may be discussed. Smoothing the path means lower resistance, shorter cycles, and less lint accumulation over time.
Step 7: Exterior Hood Service
The vent’s exit point is just as important as the interior. The damper at the hood must open fully during dryer operation and close when the appliance stops. If a screen or pest guard is present, the technician evaluates whether it restricts lint excessively. Where possible, designs that minimize blockage while still deterring pests are preferred. The hood’s cleanliness and free movement serve as final mile markers in restoring healthy airflow.
Strong, unobstructed exhaust not only improves performance but also reduces humidity and odors that can linger near the laundry area. A properly functioning hood is an essential part of the system’s safety and efficiency.
Step 8: Final Airflow Confirmation
With the vent cleared and the transition refit, the dryer is reconnected and a test cycle may be run. Technicians verify strong airflow at the exterior hood and feel for a cooler appliance surface that reflects the easier workload. If instrumentation is used, readings before and after service provide objective confirmation that resistance has dropped and exhaust is moving freely.
This is the moment when results become obvious. Loads that used to require a second run now dry on schedule, and the laundry room feels less humid. The difference is not just theoretical—you can see and feel it.
Step 9: Cleanup and Documentation
Professional service includes careful cleanup. Drop cloths are removed, the surrounding area is vacuumed, and the dryer is returned to its proper position with the corrected connector arc. You receive a summary of what was found, what was done, and what to watch for next. If small improvements are recommended—like trimming vegetation around the exterior hood or scheduling a follow-up at a certain interval—you will leave with a clear plan.
Documentation helps you track maintenance over time and is handy if you sell your home or transition to new tenants. A predictable record supports consistent performance and peace of mind.
Step 10: Maintenance Guidance Between Visits
Your role in preserving results starts right away. Clean the lint screen before or after every load, resist the urge to overfill the drum, and group similar fabrics so cycles run efficiently. Verify that the dryer is not pushed so tightly against the wall that it kinks the connector. Step outside monthly to confirm the damper opens freely. These small habits keep airflow strong and slow the pace of lint accumulation in the vent.
If performance dips—longer cycles, hotter surfaces, or weak airflow at the hood—do not wait. A quick check by a professional can prevent a small issue from turning into a major restriction.
Adapting the Process to Readington Homes
Our local housing mix shapes the way each step is executed. For short, direct runs common in first-floor laundry rooms, the process is swift and highly effective. For longer routes from upper-floor closets, extra attention is paid to negotiating elbows and verifying roof or high-wall terminations. Finished basements may require careful tool selection to protect ceilings and walls while still achieving a deep clean. Professionals adapt seamlessly to these variations so outcomes are consistent across the township.
Older properties and remodeled spaces can present unique challenges, from nonstandard pipe diameters to legacy elbows added during renovations. Clear communication and practical recommendations ensure improvements happen in a way that respects your timeline and goals.
Frequently Asked Questions
Q: How long does the full process take? A: Duration depends on vent length, number of elbows, and accessibility. Many homes are completed within a morning or afternoon, with complex runs requiring additional time. Your technician will set expectations during the initial assessment.
Q: Will you need to go on the roof? A: If your vent terminates at the roof, safe access methods are used. The technician will determine the best approach to service the termination without risking damage to roofing materials.
Q: Do I need to move the dryer before you arrive? A: Clearing the surrounding area is helpful, but moving the appliance is part of the service. Technicians protect floors and walls and handle the dryer carefully to access the transition and vent connection.
Q: Can I use DIY tools between visits? A: Light DIY maintenance can help in short, straight runs, but professional tools and verification remain important for complete results—especially in longer, more complex ducts with multiple elbows or concealed sections.
Q: What improvements most often follow a cleaning? A: Common refinements include upgrading a foil connector to semi-rigid or rigid metal, smoothing a sharp elbow, reseating joints, and ensuring the exterior damper moves freely. These tweaks lock in the benefits of the cleaning.
Mid-Process Observations That Drive Better Results
One hallmark of professional work is staying alert to what the vent reveals during cleaning. A sudden increase in airflow may indicate a major blockage has cleared; continued resistance could signal a crushed section or an overlooked elbow. Technicians adjust in real time, choosing different brush sizes, approaching from both ends, or recommending a small re-route if it would meaningfully improve performance. This adaptability turns a routine cleaning into a performance upgrade—proof that skilled dryer vent cleaning is about outcomes, not just procedure.
Education is another benefit. By the end of the visit, you know how your system is configured, what signs to monitor, and the best habits to preserve the results. That shared knowledge keeps your home running smoothly long after the equipment is packed up.
Take the Next Step With Confidence
If you want shorter cycles, a cooler laundry room, and the assurance that your dryer is operating with a clear airway, schedule professional dryer vent cleaning in Readington. With a proven, step-by-step process and clear communication at every stage, you will see and feel the difference on the very next load. Put a simple, effective plan in motion today and enjoy a safer, more efficient home.
