As a Readington homeowner, you want a clothes dryer that runs efficiently, dries quickly, and, most importantly, operates safely. A well-planned and properly executed dryer vent installation is the foundation of that safety and performance. In this comprehensive guide, you will learn how to plan routes, choose the right materials, and follow proven steps that align with best practices for homes in our New Jersey climate. Whether you are upgrading an aging line in a colonial near a wooded lot or finishing a laundry room in a newer townhome, this guide will help you navigate choices with confidence and avoid hazards associated with lint accumulation, moisture, and backdrafting. If you prefer professional support at any point, you can schedule expert dryer vent installation to ensure everything is optimized for safety and airflow.
Why a proper dryer vent matters
Every dryer produces warm, moisture-laden air and lint. The vent provides the pathway that removes heat and humidity from your home while carrying lint away to the exterior. When vents are improperly installed—too long, too many bends, crushed behind the dryer, or made from the wrong materials—airflow slows. Slow airflow means hotter dryer operation, longer cycle times, increased energy usage, and a greater risk of lint ignition. Thoughtful planning at installation keeps air moving swiftly and consistently, reducing wear on your appliance and decreasing the chance of a dangerous lint fire.
In addition to airflow, a correct installation manages condensation and prevents pests. A vent that terminates to the outdoors with a proper hood discourages birds and rodents from nesting, while a secure connection at the dryer and smooth interior walls within the duct reduce snags where lint can accumulate. These details add up to a system that performs well for many years with simple routine maintenance.
Planning your route in Readington homes
Homes in Readington, New Jersey, range from historic farmhouses to modern developments. That variety means your vent route could be straightforward through an exterior wall or complex through a crawlspace, basement, or attic. The best route is typically the shortest, with the fewest turns, and terminating at the exterior in a location that is visible and accessible for inspection and cleaning. Before you begin, sketch your laundry room, note obstacles such as studs, joists, plumbing, and electrical conduits, and look for a direct path to an exterior wall or the roof if wall termination is not feasible.
In basement laundry areas common across Hunterdon County, you may find that running horizontally to the rim joist and exiting the sidewall is the cleanest solution. For interior laundry closets, you might need to route vertically to the attic and out the roof; in such cases, keep the vertical run as straight as possible and use smooth-wall metal ducting to maintain velocity and minimize lint adhesion.
Approved materials and components
Selecting the right materials ensures durability and airflow. Use only rigid or semi-rigid metal ducting for the majority of the run. Smooth-wall rigid aluminum or galvanized steel offers the least resistance and is easiest to clean. Semi-rigid aluminum is acceptable for the short connection between the dryer and the wall transition, but avoid flexible foil or plastic accordion-style ducts anywhere in the system. These can trap lint, crush easily, and are more prone to overheating.
- Transition duct: Short length of UL-listed semi-rigid aluminum, kept as straight as possible.
- Main duct run: Rigid aluminum or galvanized steel, smooth interior, properly supported every 4 to 6 feet.
- Elbows: Use long-radius elbows instead of tight 90-degree bends to preserve airflow.
- Joint connections: Foil or metal tape rated for high temperature; never use screws that protrude into the airstream, as they snag lint.
- Wall or roof termination: Exterior hood with a damper that opens under airflow and closes to block pests and weather; choose a model with a large opening and no screen.
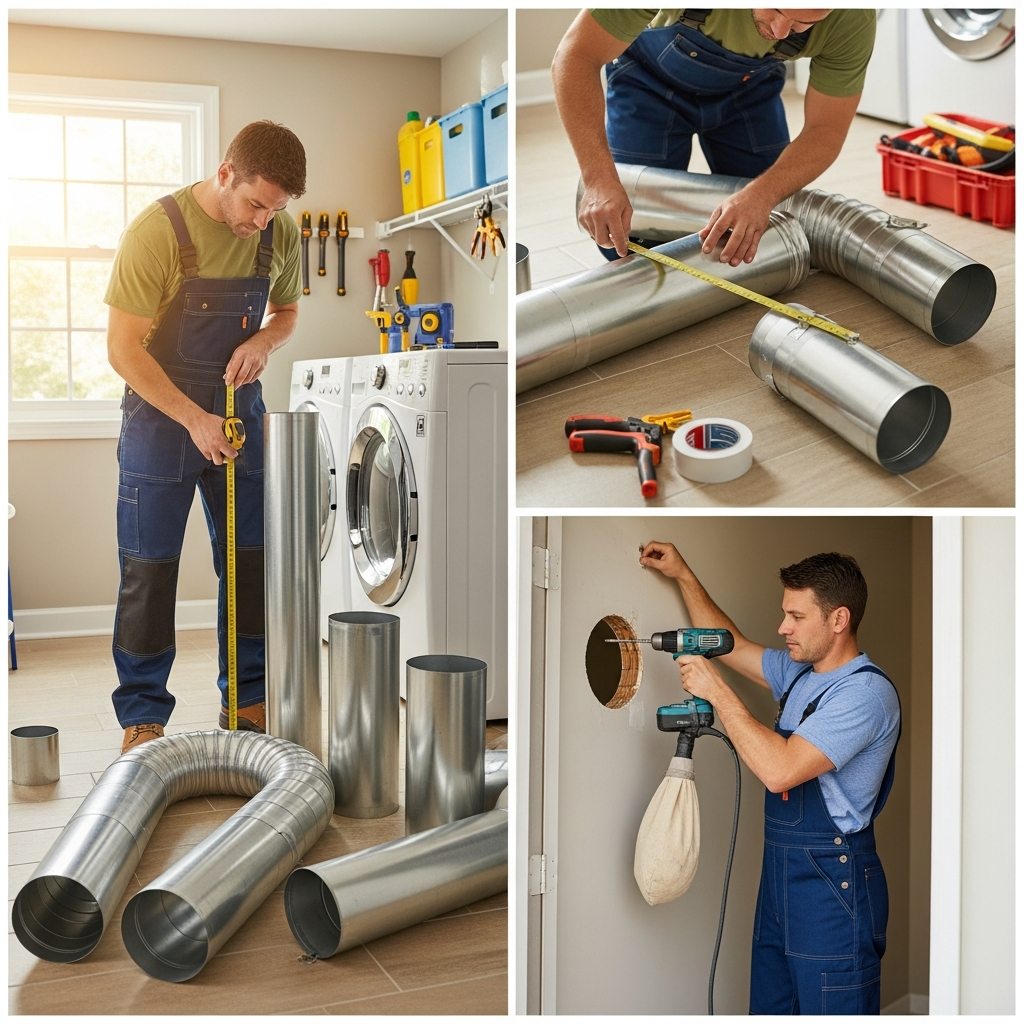
Keep a tape measure, level, drill with hole saw, aviation snips, foil tape, and clamps on hand. Having the correct tools will help you maintain straight lines, clean cuts, and airtight connections.
Clearances and airflow fundamentals
Dryers need room to breathe. Leave adequate space behind the appliance so the transition duct is not kinked or crushed when the dryer is pushed back. Use a recessed dryer vent box if the laundry area is tight; this lets the dryer sit closer to the wall without bending the duct. Where the duct passes through framing, provide protective sleeves or collars as needed and maintain clearances from combustible materials per the dryer manufacturer’s guidance.
Every bend and extra foot of duct increases friction, reducing airflow. As a planning rule of thumb, keep the total effective length within the maximum specified by your dryer manufacturer, subtracting allowances for each elbow. Long-radius elbows generally count as fewer equivalent feet than tight bends. If your home layout forces a longer route, consider incorporating a booster fan listed for dryer vent use, installed according to its instructions and located where it remains accessible for service.
Step-by-step installation overview
- Confirm the dryer location: Level the appliance, verify the electrical or gas connections are correct, and make sure there is enough space to service the vent in the future.
- Mark the exit point: From inside, choose the shortest path to an exterior wall or to a straight roof route. Drill a pilot hole to confirm the location from the outside before committing to a full opening.
- Cut the opening: Use the correct hole saw size to match your termination hood. Cut through siding carefully and use a sleeve when penetrating masonry.
- Install the exterior hood: Caulk the perimeter as appropriate for weather protection and fasten it securely, ensuring the damper moves freely.
- Assemble interior duct runs: Start at the dryer location and work toward the exterior. Dry-fit sections first to perfect your alignment and minimize the number of elbows.
- Join sections without screws: Use high-temperature foil tape to seal each seam. Where mechanical fastening is necessary, use short, shallow rivets that do not protrude into the airflow.
- Support the duct: Add hangers or straps every 4 to 6 feet to prevent sagging and maintain slope toward the exterior if condensation is a concern.
- Connect the transition: Attach a short, UL-listed semi-rigid transition from the dryer outlet to the wall connection. Keep this run as straight as possible.
- Test the airflow: Run the dryer on air-fluff. Go outside to confirm the damper opens fully and that the airflow feels strong and even.
- Finish and document: Label the vent route if any segments are concealed and note the effective length and elbow count for future maintenance planning.
Local climate considerations
Readington experiences humid summers and cold winters. Warm, moist exhaust air passing through a cold duct in winter can condense. To reduce condensation risk, keep the duct run inside conditioned space whenever possible, insulate exposed sections in attics or unheated basements with insulation rated for ducts, and maintain a gentle slope to the exterior so incidental moisture drains outward rather than back toward the dryer.
Exterior terminations should be positioned where snow accumulation will not block the outlet and where landscaping does not impede air discharge. Mount the hood at a height that remains clear after typical snowfall and avoid locations under rooflines that produce heavy icicles or meltwater, which could freeze the damper shut.
Common mistakes to avoid
- Using plastic or foil accordion ducting for long runs. These sag and trap lint.
- Driving sheet-metal screws into the airflow path. Even small protrusions can snag lint.
- Excessive elbows or sharp 90-degree turns. Prefer long-radius bends to maintain velocity.
- Terminating into an attic, crawlspace, or garage. Always vent directly outdoors.
- Adding screens at the exterior hood. Screens clog with lint and block airflow.
- Failing to seal joints. Air leaks reduce velocity and can blow lint into building cavities.
If your current setup relies on long, cramped routes or older materials, it may be smarter to re-route or upgrade rather than patching problems. A mid-project consultation or full-service help from experienced pros can optimize routing, materials, and sealing so you gain efficient drying and reduced fire risk. If that sounds helpful, consider contacting a specialist in professional dryer vent installation to assess options, especially when walls or ceilings are being opened for other renovations.
Testing and commissioning
Commissioning your new vent is more than a quick airflow check. Start by cleaning the lint filter and confirming the dryer’s vent setting is correct if it has sensors. Run the dryer on a timed, no-heat cycle first to verify unobstructed air movement. At the termination, watch that the damper opens fully and closes smoothly when the dryer stops. Feel for strong, steady airflow and listen for rattles that could indicate loose joints or a misaligned hood.
Next, run a heat cycle with a small load of towels. Monitor for warm, slightly humid but not steamy air at the outlet. Check for any warm spots along the duct that suggest leaks, and inspect all taped joints. Inside, verify that the dryer cabinet does not become excessively hot and that cycles complete in a reasonable time. If drying remains slow, re-examine your equivalent length calculations and each elbow for obstructions or crushing.
Maintenance roadmap for longevity
A new vent performs best when kept clean. Empty the lint filter after every load and periodically wash it with mild soap to remove detergent film that can restrict airflow. Plan for seasonal visual checks of the exterior hood to ensure the damper moves freely and isn’t obstructed by lint, shrubbery, or snow. Depending on usage, schedule a thorough duct cleaning annually or semiannually, particularly for larger households, heavy laundry routines, or homes with pets.
Stay alert for warning signs: longer dry times, a hot laundry room, or a musty smell can indicate a developing restriction. Catching small issues early—such as a loose clamp or an elbow beginning to clog—prevents bigger problems later. Keeping a simple log of cleanings and inspections helps maintain consistency and provides useful information if you ever sell your home or service the dryer.
Frequently asked questions
Q: What is the best material for the main vent run? A: Smooth-wall rigid metal—either aluminum or galvanized steel—is recommended for low resistance and durability. Semi-rigid aluminum is appropriate for the short transition between the dryer and the wall connection.
Q: How long can my dryer vent be? A: Follow the dryer manufacturer’s specifications for maximum equivalent length, which subtracts allowances for elbows. Shorter and straighter is always better. If your route exceeds the limit, consult about redesign or a listed booster fan installed per instructions.
Q: Can I vent into a garage or attic to avoid cutting an exterior wall? A: No. Venting must terminate outdoors to remove moisture and lint safely. Discharging into enclosed spaces creates mold risks and fire hazards.
Q: Do roof terminations work in snowy winters? A: Yes, provided the run is straight, insulated where needed, and the roof cap is properly installed and maintained. Many homeowners prefer wall terminations at a snow-safe height for easier access.
Q: How often should I clean the vent? A: At least annually, more often for large households or heavy usage. Also perform seasonal visual checks of the exterior hood and after any renovation that could disturb ductwork.
Q: What size hole do I need for the termination? A: Most hoods require a 4-inch opening to match standard dryer duct sizing. Verify with your hood’s specifications before cutting.
Q: Are magnetic or louvered hoods better? A: Both can work. Choose a design with minimal resistance, no screen, and a damper that seals when closed. Magnetic closures can resist wind better; louvers are simple and widely available.
Q: Can I use tape alone to secure joints? A: High-temperature foil tape is effective for sealing, but where code or manufacturer guidance requires mechanical fastening, use shallow rivets and keep the interior smooth. Do not use duct tape; it degrades under heat.
Ready to improve your dryer’s performance and safety?
If you are planning a new laundry space, replacing an old dryer, or correcting an underperforming vent, now is the perfect time to implement best practices that deliver faster drying and lower risk. When you want expert hands, clear communication, and a system tuned for the way you use your home, schedule trusted dryer vent installation and enjoy a safer, more efficient laundry routine all year long in Readington.
