An organized inspection is the fastest way to uncover ductwork problems that waste energy and undermine comfort in your Readington, New Jersey home. This comprehensive checklist walks you through preparation, safety, visual checks, functional tests, and documentation so you can pinpoint issues and plan effective repairs. Even if you intend to hire a professional later, a structured survey clarifies priorities and helps you communicate findings. If your walkthrough reveals damage you do not want to tackle alone, consider scheduling local air duct repair to correct leaks, reconnections, and insulation gaps with confidence.
Preparation and Safety
- Turn off the HVAC system at the thermostat and breaker before touching ducts.
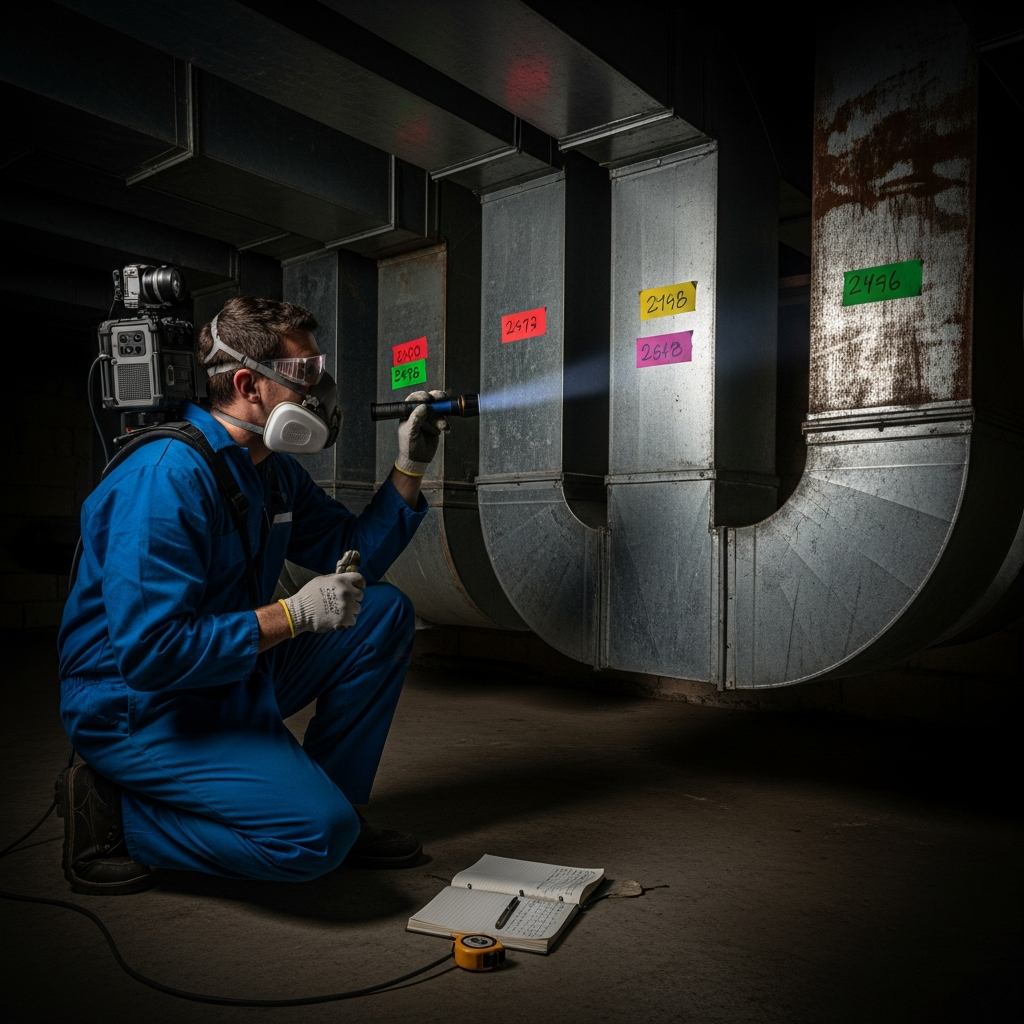
- Wear gloves, safety glasses, and a dust mask or respirator.
- Gather a flashlight, painter’s tape, marker, camera or smartphone, UL 181 foil tape, mastic, sheet-metal screws, a utility knife, and a tape measure.
- Ensure safe access to basements, crawlspaces, and attics; set boards in attic spaces to avoid stepping through drywall.
- Clear combustible storage away from the furnace or air handler to maintain safe working areas.
System Overview and Mapping
- Identify the air handler or furnace and the main supply and return plenums.
- Trace the main trunk lines and label each branch, noting which rooms they serve.
- Mark manual dampers and record their current positions.
- Photograph each junction and transition for reference.
- Note materials: sheet metal, flex duct, or fiberboard, and any visible insulation ratings.
Visual Inspection: Leaks and Loose Connections
- Check seams on trunk lines and around elbows for gaps or dried, peeling tape.
- Inspect takeoff collars for wobble; loose collars are common leak sources.
- Verify flex duct inner liners are zip-tied and sealed to collars before the insulation and jacket are pulled over.
- Look for missing mastic, cracked seals, and screw holes that are not sealed.
- Examine boot-to-drywall or boot-to-floor gaps at registers; mark any visible cracks.
Physical Inspection: Support and Alignment
- Confirm hangers support flex duct at least every 4 to 6 feet and keep runs gently curved, not sharply bent.
- Ensure sheet-metal ducts are properly strapped and level to avoid stress on joints.
- Identify crushed or kinked sections that restrict airflow.
- Verify transitions between sizes are smooth and properly fitted.
- Check access panels on air handlers for tight closure and intact gaskets.
Insulation and Condensation Control
- Look for missing, torn, or wet insulation on supply runs in unconditioned spaces.
- Confirm vapor barriers are intact to prevent condensation in humid Readington summers.
- Note rust, water stains, or mold-like growth and trace back to likely leaks or temperature differentials.
- Seal air first, then repair insulation for lasting performance.
Operational Checks
- With the system running, feel for air movement at seams and joints; whistling indicates leaks.
- Use a tissue or incense to detect subtle drafts along questionable seams.
- Compare airflow at registers room to room; note weak or noisy supplies.
- Listen for rattling, banging, or fluttering that may indicate loose parts or liner issues.
- Smell for unusual odors that could point to contamination or moisture problems.
Return Duct Integrity
- Ensure returns are airtight to prevent drawing dusty or unconditioned air from basements or attics.
- Inspect return grilles and filter racks for gaps that bypass filtration.
- Look for makeshift returns through wall cavities without proper sealing or lining.
- Verify return pathways are not blocked by furniture or renovations.
Boots, Registers, and Grilles
- Tighten loose registers and verify boots are secure to subfloor or drywall.
- Seal gaps around boots to prevent leakage into wall and floor cavities.
- Vacuum debris from boots and ensure dampers in registers operate smoothly.
- Replace broken grilles that chatter or restrict airflow.
Documentation and Prioritization
- Label each issue with a number and photograph it.
- Classify problems by impact: major leaks at plenums and trunks first; then branch leaks, kinks, and insulation fixes.
- Estimate time and materials for each item to plan efficient repairs.
- Record damper settings to return to baseline after work.
Repair Plan: What to Fix First
Start with the highest-pressure areas—plenum seams and trunk connections—because sealing these yields the biggest gains. Next, resecure loose takeoffs, reconnect flex liners, and correct kinks. Finally, address boot gaps and insulation repairs. Work in stages so you can test improvements after each phase. If you hit a wall with inaccessible leaks or suspect design shortcomings, midstream is a great time to call for duct repair services to handle advanced diagnostics and corrections.
Materials and Methods Reference
- Use UL 181-rated foil tape for smooth, clean surfaces and for closing insulation jackets.
- Use water-based mastic, applied with a brush, for rough seams and larger gaps; embed mesh for wide joints.
- Use sheet-metal screws to stabilize collars and fittings before sealing.
- Use proper hangers or straps to eliminate sags and preserve gentle bends.
- Replace damaged flex duct rather than trying to patch severely crushed sections.
Seasonal Considerations in Readington
Winter’s dry air can shrink some materials and open marginal seams, while summer humidity amplifies condensation potential on cold ducts. Plan inspections before each major season. In spring, pollen and fine debris accumulate; ensure returns and filter racks are tight to keep irritants from bypassing filters. After severe storms, reinspect attic and crawlspace runs for moisture intrusion or dislodged insulation.
Quality Control After Repairs
- Re-test previously marked leak points with the system running.
- Confirm that new seals are continuous without gaps or bubbles.
- Verify that flex duct supports remove sags and that bends are smooth.
- Check register airflow again to confirm improvements; adjust dampers gradually.
- Update your photo log with after images to document results.
Frequently Asked Questions
Q: How long should an inspection take? A: For an average Readington home with accessible ducts, plan one to three hours for a thorough survey, more if crawlspaces or attics are tight.
Q: What are the biggest energy-wasting leaks? A: Gaps at the plenum and main trunk seams typically waste the most air because pressures are highest there.
Q: Is mastic messy to use? A: It can be, but a small brush and drop cloth help. Water-based mastic cleans up with water before it dries.
Q: Should I close registers in unused rooms? A: Avoid fully closing supplies; it can increase static pressure and harm efficiency. Balance gently using dampers instead.
Q: Do I need special tools? A: Basic hand tools, a flashlight, and quality sealants cover most inspection-driven repairs. An anemometer is helpful but not required.
Q: What about return leaks? A: Return leaks are critical because they pull unfiltered, unconditioned air into the system. Prioritize sealing them.
Q: Can insulation fix airflow problems? A: Insulation controls heat gain or loss but does not correct restrictions. Fix leaks and kinks first, then insulate.
Q: When should I call a pro? A: If you find hidden breaks, contamination, or design issues you cannot access or diagnose, professional testing and air duct repair will save time and ensure system-wide performance.
Book Confident Repairs in Readington
A disciplined checklist turns a confusing maze of ductwork into a manageable project. By documenting leaks, securing connections, restoring insulation, and verifying airflow, you can reclaim comfort and healthier indoor air. When you want guaranteed workmanship or advanced diagnostics, schedule trusted local help for precise air duct repair and enjoy consistent results across every room.
