Older homes in Readington, New Jersey hold character, charm, and unique construction details that reward careful planning during any mechanical upgrade. When it comes to new ductwork, the best results come from a step-by-step process tailored to older framing, plaster or lath walls, stone foundations, and limited chases. This guide explains how professionals approach historic and mid-century structures to preserve aesthetics, protect indoor air quality, and deliver quiet, balanced comfort. If you are just beginning to explore your options, reviewing a local overview of air duct installation can help you visualize what a respectful, performance-focused project looks like in a vintage home.
Success in older homes depends on a mindset: treat the building as a legacy to be improved thoughtfully. That means thorough discovery, minimally invasive routing, and coordination with specialists when older materials or finishes are involved. It also means testing at the end so you know the system performs without guesswork.
Step 1: Historical Assessment and Comfort Interview
Begin with a conversation about comfort patterns and the spaces you use most. Document rooms that are chronically warm or cool, noise concerns, and any areas with moisture or drafts. In older homes, this interview often reveals clues about hidden cavities, prior renovations, or previous heating strategies that influence routing and return strategies.
Professionals also note architectural elements: thick plaster, decorative trim, fireplaces, built-ins, and original staircases. These features help define routing limits and reveal opportunities for discreet chases.
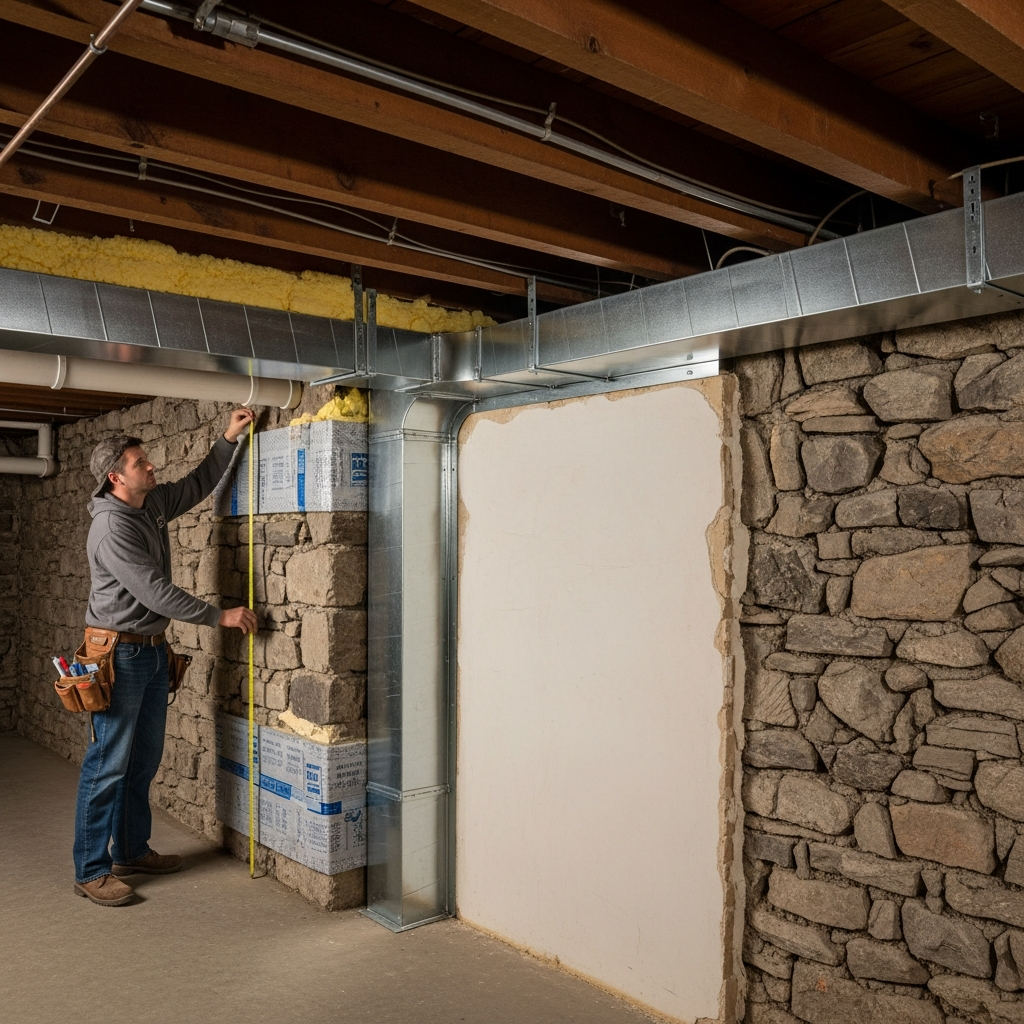
Step 2: Structural and Material Survey
Older framing can be unconventional. Balloon framing, true-dimension lumber, or irregular joist spacing may affect where and how ducts can run. Inspect basements, crawlspaces, and attics for clearance, moisture, and insulation conditions. Identify any materials that require special handling, and coordinate with qualified abatement or remediation experts when necessary to ensure a safe work environment.
Survey findings guide layout decisions, determine where soffits are acceptable, and clarify how returns will be sized and placed to maintain balanced pressure throughout the home.
Step 3: Load Calculations and Design for Vintage Layouts
Room-by-room loads are essential in older structures, where insulation levels and air sealing can vary widely from one area to the next. The design should account for solar gain, window condition, and occupancy to assign accurate airflow targets. Returns must be sized generously, especially where interior doors are often closed, to prevent pressure imbalances and to support equipment health.
Quiet operation is a common priority. Designers plan straighter runs, long-radius fittings, and lined sections near bedrooms or living areas. Register placement respects architectural symmetry while prioritizing even air distribution.
Step 4: Choosing Materials With Care
Metal trunks provide durability and cleanliness for long service life. Short, fully extended flex connections can be used for final drops to registers where space is tight, but older homes particularly benefit from disciplined use of smooth, well-sealed fittings to reduce turbulence and noise. Insulated boots and continuous duct insulation protect against condensation and help maintain designed temperatures in unconditioned areas.
Step 5: Access Planning and Preservation
Preserving finishes is paramount. The plan should minimize openings in plaster and lath, route through closets or secondary spaces when possible, and confine new chases to areas that can be integrated into the home’s aesthetic. Where patching is unavoidable, coordinate with finishing specialists who understand period textures and trim profiles.
Basements in older Readington homes may feature low headroom and stone foundations. Creative, low-profile trunks and strategic soffits can maintain clearance while delivering airflow to upper levels.
Step 6: Protection and Site Setup
Before work begins, floors and stair treads are covered, path protection is installed, and containment is set up where cutting will occur. Clear communication ensures you know which rooms will be accessed and when. Debris management is planned in advance to keep the site orderly and to protect delicate finishes.
Step 7: Careful Demolition and Discovery
If any existing ductwork or obsolete components must be removed, this is done with extra care in older homes to avoid damaging surrounding finishes. Openings are made surgically, revealing framing realities that may refine the layout. Professional teams expect surprises and adjust while preserving design intent—especially supply and return balance.
Step 8: Fabrication, Routing, and Installation
Trunks and branches are fabricated to fit the home’s constraints, prioritizing straight runs, smooth transitions, and long-radius elbows. Flex is kept short and fully extended for final connections only. Penetrations through unconditioned areas are sealed and insulated to protect energy performance and prevent condensation. Where registers meet historic trim, final placement is double-checked for both function and aesthetics.
Step 9: Return Air Strategy for Door-Closed Scenarios
Many older homes have solid doors and thick walls that isolate rooms. Dedicated returns or well-designed transfer pathways ensure each room can breathe even when doors are closed. This strategy reduces drafts, balances temperatures, and supports equipment performance.
Step 10: Sealing, Insulation, and Acoustic Detailing
Seams are sealed with mastic and approved tapes; insulation is continuous across attics, basements, and crawlspaces. Acoustic priorities near bedrooms may call for lined sections or carefully selected registers to limit sound transmission. Labeling dampers and providing access points ensures adjustability without damaging finishes later.
Step 11: Trim-Out and Finish Preservation
Registers and grilles are installed with attention to alignment and wall or ceiling textures. Where plaster repairs are needed, patching is coordinated to match existing finishes as closely as possible. The goal is a clean, integrated look that respects the home’s era while delivering modern comfort.
Step 12: Commissioning and Documentation
Commissioning confirms that the installed system meets design targets. Technicians measure static pressure, verify airflow at key rooms, and balance dampers for even comfort. Documentation includes readings, damper positions, and maintenance guidance. In older homes, this record is especially valuable for future renovations that might intersect with duct pathways.
Coordination With Other Specialists
Vintage homes sometimes require support from additional trades. Carpenters may craft discreet chases; finishers replicate historic textures; insulators address gaps discovered during routing. Early coordination ensures that each specialist protects the home’s character while supporting performance goals.
Homeowner Preparation Tips
- Identify rooms where access is most acceptable for discreet chases.
- Move fragile items, artwork, and heirlooms from work zones.
- Discuss daily cleanup and protection for staircases and hallways.
- Plan for pet safety and predictable work hours.
- Clarify who will handle any finish repairs after trim-out.
Common Pitfalls in Older Homes
- Forcing long, coiled flex runs that restrict airflow and add noise.
- Undersized or poorly placed returns that cause pressure imbalances.
- Skipping insulation around ducts in unconditioned areas, inviting condensation.
- Hidden dampers or filters that complicate maintenance.
- Inadequate site protection that damages irreplaceable finishes.
Maintenance and Long-Term Care
A thoughtfully installed system in an older home is easy to maintain. Keep filters on schedule, verify that insulation remains intact in basements and attics, and ensure registers remain unobstructed. If you renovate or reconfigure rooms, request an airflow check to keep the system balanced without compromising original details.
Mid-project check-ins help align the plan with discoveries behind old walls. Many Readington homeowners reference a local summary of air duct installation to confirm their expectations and ask sharper questions as work progresses.
Frequently Asked Questions
Q: Will new ducts damage my home’s historic features? A: With careful planning, routing through closets or secondary spaces, and coordinated finishing, intrusion can be minimized and finishes preserved.
Q: Can you really achieve quiet operation in a vintage house? A: Yes. Proper sizing, long-radius fittings, acoustic strategies, and balanced returns make a noticeable difference.
Q: How do you handle door-closed comfort? A: Dedicated returns or transfer pathways prevent pressure build-up and keep rooms comfortable even with doors shut.
Q: Are soffits always required? A: Not always. Creative low-profile trunks and selective chase placement can reduce or eliminate visible soffits in many cases.
Q: What about insulation in attics and basements? A: Continuous insulation around ducts in unconditioned areas is critical for performance and condensation control.
Q: How is performance verified? A: Through commissioning—measuring static pressure and airflow, balancing dampers, and confirming quiet operation.
Q: What should I prepare before work begins? A: Clear access paths, protect valuables, plan for pet safety, and discuss daily cleanup and containment.
Move Forward With Confidence
Older homes reward craftsmanship and patience. By following a step-by-step approach—assessment, design, protection, precise installation, and commissioning—you can achieve modern comfort without sacrificing character. When you are ready to partner with a team that respects both performance and preservation, explore expert air duct installation and set your Readington home on a path to quiet, balanced comfort.
