When rooms never quite reach the right temperature, dust settles too quickly, or a whistle greets you each time the blower starts, your ductwork may be the hidden culprit. Troubleshooting air ducts is part detective work, part methodical testing. In Readington, New Jersey, where humidity rises in summer and temperatures dip in winter, those seasonal swings expose weaknesses in sealing, insulation, and support. With a structured approach, you can identify the root causes behind weak airflow, uneven comfort, and noisy operation, then take safe, effective steps to correct them.
Good troubleshooting begins with a clear objective: restore the duct system so every connection is tight, every bend is smooth, and every run is protected where it crosses unconditioned spaces. To achieve that, you will gather clues, confirm them with tests, and perform targeted repairs. If you find signs that the problem is larger than expected—like inaccessible runs or layout issues—blend your efforts with professional support. Partnering with specialists for thorough air duct repair can be the most direct route to lasting results.
Step 1: Define the symptoms precisely
List what you experience and where. Note which rooms are too warm or too cool, what time of day issues are worst, and whether certain fan speeds or equipment modes change the symptoms. Write down any noises, their locations, and when they appear—startup, steady operation, or shutdown. The more specific your notes, the easier it is to match them to common causes. For example, whistling near a boot typically indicates a gap at the boot-to-drywall joint, while rattles often signal loose fasteners or insufficient support.
Correlate comfort complaints with room distance and elevation relative to the air handler. Upper floors can struggle if long runs leak or are restricted, particularly in older Readington colonials. A room above a garage may be affected by poorly insulated ducts in that buffer space. Make a simple floor plan sketch and mark problem areas to visualize patterns.
Step 2: Check the basics safely
Turn off power to the system at the thermostat and breaker. Inspect the air filter and housing; a clogged filter or a loose fit that allows bypass can reduce airflow or add dust to the system. Verify that registers are open and unobstructed by furniture or rugs. At the air handler, confirm panels are seated properly and that the condensate drain is clear, as excess moisture can compound return-side issues in summer.
Look for obvious red flags: crushed flexible duct, missing insulation, or gaps at the return plenum. Use a flashlight to follow supply and return trunks. In basements and crawlspaces, explore carefully; look for dust streaks at seams that betray leakage. In attics, ensure you have a stable platform before moving near ducts. Safety is a continuous priority as you progress.
Step 3: Identify leaks and restrictions
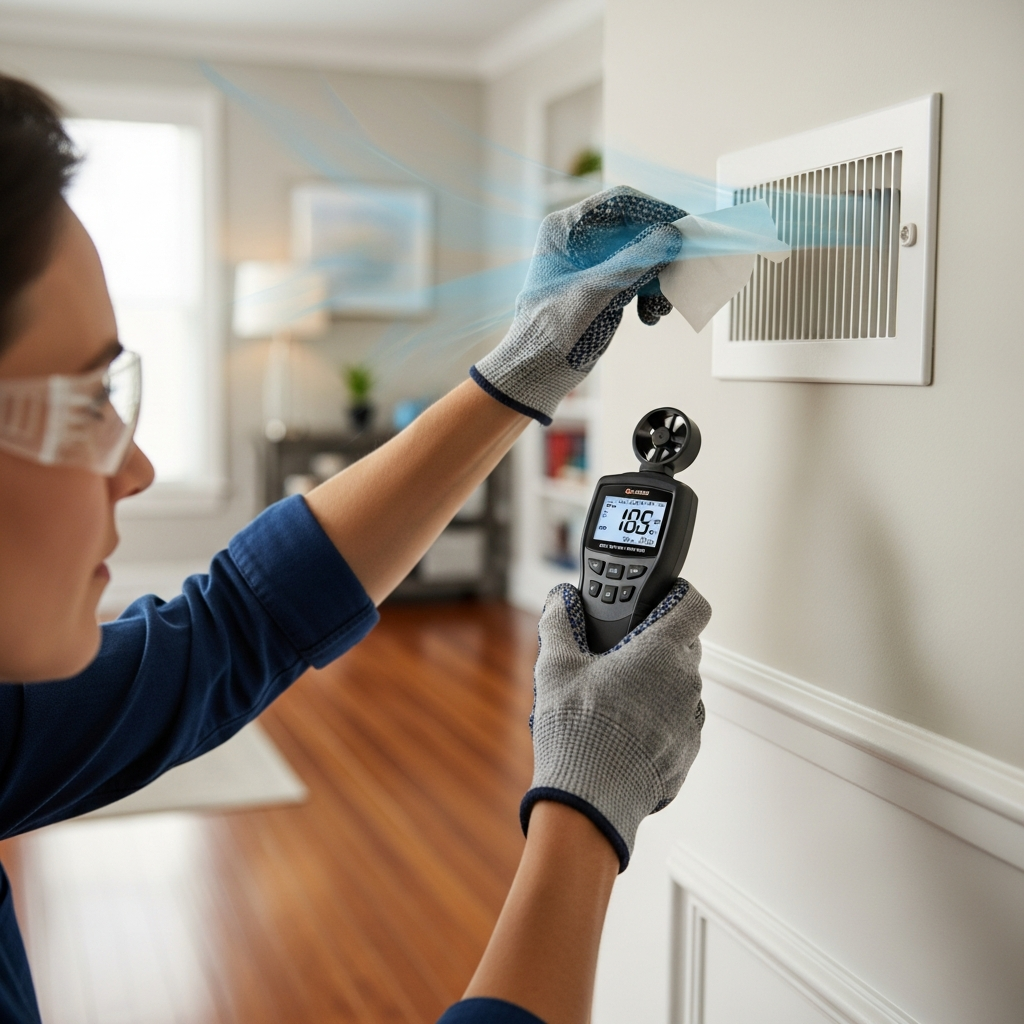
Use your senses and simple tests to pinpoint issues. With the blower briefly on, stand clear of moving parts and feel around accessible joints for air movement; then power off again. The tissue test at registers reveals weak or inconsistent airflow. Shine a light along seams in a darkened space; light leaks confirm gaps. Gently press along flexible runs to detect internal collapse or sharp bends hidden beneath insulation.
Mark each suspect location with a wax pencil. For returns, pay extra attention to connections near the filter housing and any open chases that could draw basement or attic air. Small cracks at elbows and takeoffs might not look alarming, but they can add up to significant loss, especially on long runs to distant rooms.
Step 4: Prepare surfaces and secure supports
Clean the areas you plan to seal with a damp rag and let them dry. Remove failed cloth duct tape and flaky residue. Tighten loose screws, add missing ones, and upgrade supports to eliminate sagging. Flexible duct should ride on wide, smooth straps; avoid thin wire that can cut the jacket. Ensure bends are gentle arcs rather than tight turns. Proper support not only improves airflow but also reduces noise and mechanical stress.
At the boot-to-drywall interface, vacuum dust and debris before sealing. Check that supplies and returns sit square and flush with surrounding surfaces. On metal trunks, lightly scuff shiny areas if needed so mastic adheres better. Good preparation is the difference between a short-lived patch and a durable repair.
Step 5: Seal leaks with HVAC-rated materials
Apply mastic to seams, elbows, and takeoffs, smoothing it to eliminate pinholes. Where vibration or movement occurs, reinforce with UL-listed foil tape, firmly burnished to make full contact. On flexible duct connections, secure the inner liner to the collar with a mechanical clamp before taping the outer jacket seam. Confirm that every boot is sealed where it meets drywall or subfloor to stop dust tracks and noise at the register.
If you encounter a severely crushed flex section or a rusted metal elbow, replace rather than patching. Cut back to sound material, fit a new section, and seal all joints. Maintain required clearances from flues and avoid burying service panels under insulation or sealant. Patience here pays off in quieter operation and happier rooms.
Step 6: Insulate and control condensation
Insulate ducts that run through attics, basements, or crawlspaces. In Readington’s humid summers, cold supply air will cause bare metal to sweat, creating rust and nearby mold risk. After sealing, wrap ducts with appropriate R-value insulation and seal seams to preserve a vapor barrier. Ensure insulation is not compressed under straps. Inspect for water stains, rust, or musty odors that might indicate ongoing condensation issues and correct them promptly.
At the air handler, verify that the condensate drain is clear and routed properly. Excess moisture in the return plenum can undermine your sealing work and add to indoor humidity. Addressing moisture is as important as sealing when it comes to long-term comfort and system health.
Step 7: Test, balance, and document
Power up the system and listen carefully. A new whistle may point to a tiny missed gap; a rattle suggests a support still needs attention. Use the tissue test at each register to compare airflow with your initial notes. Make small damper adjustments and wait between changes to evaluate results. Balance is a whole-house property; improving one room should not starve another.
Photograph sealed joints and replaced sections, and record damper positions that yield the best comfort. Documentation helps you maintain gains and guides a technician if you later seek an expert assessment. If problems persist after careful work, the root cause may be sizing or layout. In that case, partner with a local team for diagnostic testing and comprehensive air duct repair.
Readington-specific clues and fixes
Seasonal humidity is a major factor in troubleshooting. In summer, sweating ducts in basements or crawlspaces suggest missing insulation or a broken vapor barrier. In winter, dry air may shrink some sealants slightly, revealing hairline leaks near boots or takeoffs. Pay extra attention to the first few feet from the air handler; sealing here often yields the biggest comfort gains at distant rooms. In older homes, transitions added during remodels can be undersized; replacing a restrictive fitting can transform airflow to a stubborn bedroom.
Keep an eye on returns near utility rooms. Open chases or gaps can draw in odors or fine particles, which your coil and filter then distribute. Sealing these returns improves both air quality and equipment cleanliness. If you have rooms over a garage, check for ducts running through that space; add insulation and seal carefully to prevent comfort loss and noise.
Frequently asked questions
Why are some rooms still uncomfortable after I seal leaks? Sealing improves delivery, but branch sizing, layout, and return capacity also matter. Minor damper changes can help. If comfort still lags, a professional may recommend resizing runs or adding returns to balance the system.
What tape should I use on ducts? Choose UL-listed foil tape rated for HVAC applications. Press and burnish it firmly to a clean surface. Avoid cloth duct tape, which fails in temperature and humidity extremes.
How do I know if a flex run must be replaced? If the inner liner is torn or permanently crushed, replacement is the right call. Minor kinks can be smoothed with better support and routing, but damaged liners create turbulence and leaks.
Is it okay to shut registers in unused rooms? Fully closing registers can raise static pressure and stress the blower. Use small adjustments and confirm results with airflow tests rather than closing any register completely.
Do I need special consideration for ducts near furnaces or water heaters? Maintain required clearances and never block combustion air paths. If you are unsure about safety distances or fire-rated assemblies, stop and consult a professional.
Restore quiet, consistent comfort
Systematic troubleshooting turns guesswork into confident action. By defining symptoms, confirming causes with simple tests, and sealing and supporting ducts with the right materials, you can deliver more conditioned air to the rooms that need it most. Document your work and revisit performance as seasons change. When an issue requires specialized tools or access you do not have, call on a local team that understands Readington’s homes and climate. For dependable help finishing the job and ensuring long-term performance, schedule expert air duct repair services and enjoy quieter operation, cleaner air, and steadier comfort throughout your home.
