A well-organized checklist transforms air duct repair from a vague goal into a clear, step-by-step plan you can execute safely and confidently. For Readington, New Jersey homeowners, this matters even more because seasonal humidity, cold snaps, and a mix of older and newer construction details all influence how ducts perform. This long-form checklist is designed to help you evaluate your system, prioritize fixes, and carry out durable repairs without overlooking safety or comfort. Use it as a reference before, during, and after your project, and adapt it to your home’s unique layout.
Start by defining success. A successful repair eliminates leaks that pull in dusty or humid air, removes bottlenecks that starve distant rooms, restores proper insulation where ducts cross unconditioned spaces, and keeps the system balanced so noise and wear do not increase. At the same time, your process should protect your health, preserve easy access for future service, and avoid any changes that might conflict with safety codes or manufacturer instructions. If you uncover surprises or reach a section you cannot access, blend this checklist with professional support. For complex situations or hidden damage, scheduling expert air duct repair can be the most efficient way to finish strong.
Checklist part 1: safety and preparation
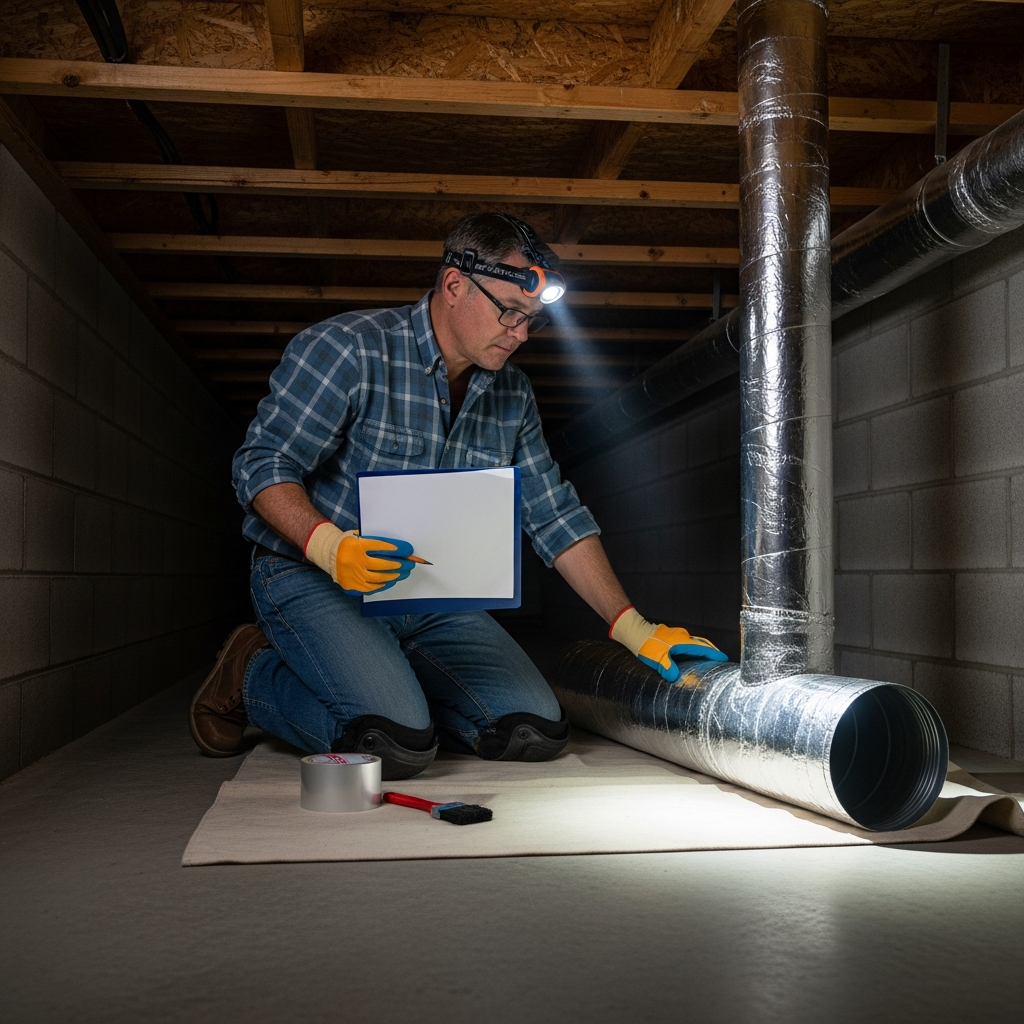
Confirm the HVAC system is powered down at both the thermostat and the breaker. Set up bright, stable lighting where you will work. Clear the path to the air handler and main trunks so you can move without tripping hazards. Protect floors with plastic or drop cloths. Keep children and pets out of work zones. Assemble personal protective equipment: cut-resistant gloves, safety glasses, a respirator for dusty areas, long sleeves, and knee pads if you will be in an attic or crawlspace.
Gather tools and supplies before you start: HVAC mastic, UL-listed foil tape, sheet metal screws, a cordless driver, tin snips, clamps for flexible duct, a brush for mastic application, rags, and a HEPA vacuum. If insulation touch-ups are planned, obtain duct wrap of the correct R-value. Have a notebook ready for observations, measurements, and photos. Label storage bins for screws and small parts so nothing gets lost mid-project.
Checklist part 2: mapping and inspection
Sketch a simple map showing the air handler, supply trunk, return trunk, major branches, dampers, and room registers. Note where ducts cross unconditioned spaces like attics, basements, or crawlspaces. As you trace the runs, look for obvious problems: kinks in flexible duct, crushed elbows, sagging spans, loose takeoffs, and boots that are not sealed to floors or ceilings. Identify any sections you cannot reach safely and flag them for professional review.
Check for dust streaks along seams and at takeoffs; these often point directly to air leaks. At the return plenum, look for unsealed openings or gaps that could draw basement or attic air into the system. Examine insulation for damp spots, gaps, or missing wrap. In Readington summers, condensation can reveal itself as rust spots or water stains on nearby framing; take photos of these clues so you can revisit them after sealing and insulating.
Checklist part 3: cleaning and surface prep
Clean the areas you intend to seal. Wipe metal to remove oil and dust, then allow it to dry. Vacuum loose debris around joints and inside accessible sections so mastic and tape adhere. Do not push brushes or hoses deep into flex ducts or lined trunks, where you could damage the interior. If you dislodge large amounts of dust while prepping, take a break and ventilate the space so you do not breathe suspended particles. Good preparation is the foundation of a long-lasting seal.
If previous repairs used cloth duct tape, remove it. Scrape away flaky adhesive and wipe the surface clean. Inspect mechanical supports and add or adjust hangers where necessary to eliminate sagging. For flexible ducts, ensure bends form smooth arcs instead of sharp angles that increase resistance. If you need to replace a crushed segment, cut back to sound material and prepare a proper collar connection before resealing.
Checklist part 4: sealing and fastening
Apply mastic generously at seams, elbows, and takeoffs. Smooth it with a brush so there are no gaps or bubbles. Where vibration is likely, reinforce mastic with UL-listed foil tape, burnished firmly to the surface. On flexible duct connections, first tighten a mechanical clamp on the inner liner over the collar, then seal the outer jacket seam with foil tape. Confirm every supply and return boot is airtight where it meets surrounding surfaces; seal the boot-to-drywall or boot-to-subfloor gap to prevent dust tracks and infiltration.
For metal repairs, crimp and fit replacement pieces as needed, secure them with sheet metal screws, and seal all joints. Avoid overtightening screws that can distort thin metal. Keep fasteners flush and aligned so future service panels can still be removed. Maintain clearances from combustible materials and flues, especially in basements with fuel-burning equipment. If you cannot achieve a safe clearance, pause the repair and consult a professional.
Checklist part 5: insulation and condensation control
Wrap ducts that pass through attics, basements, and crawlspaces with properly rated insulation. Seal seams in the insulation with foil tape to maintain a continuous vapor barrier. Insulate boots where practical, but do not block registers or restrict damper movement. Inspect for areas where cold supply air could meet humid ambient air in summer, as these are likely condensation points. Correcting insulation gaps in these zones protects against rust and nearby mold growth while preserving system efficiency through Readington winters.
Double-check support for flexible ducts after insulating. Straps should be wide and smooth, spaced frequently enough to prevent sagging. Insulation should not be compressed tightly under straps, which can reduce R-value. Keep ducts off the attic floor where stored items or foot traffic could crush them, and use a stable platform if you must cross joists during work.
Checklist part 6: balancing and verification
Restore power to the system and run the blower. Listen for whistling, rattles, or drumming that reveal remaining leaks or loose sections. At registers, use the tissue test or an anemometer to compare airflow before and after repairs. Make small damper adjustments to improve comfort in distant rooms, and record each change so you can revert if needed. Check that the return path is unobstructed and that the filter fits snugly with no bypass gaps.
Walk the home to confirm results in lived spaces. Rooms that used to struggle should respond more quickly to thermostat changes. Note any spaces that remain stubborn; these may require layout changes, additional returns, or a professional static pressure evaluation. In the middle of your project, if symptoms persist despite sealing and balancing, blend DIY effort with professional air duct repair to tackle the deeper causes efficiently and safely.
Checklist part 7: documentation and maintenance schedule
Take photos of sealed joints, replaced sections, and insulated runs. Label damper positions that worked best after testing. Keep a written log of materials used and dates of repair. This record streamlines future maintenance and helps a technician if you later request an assessment. Plan seasonal checkups: a quick spring/summer review for condensation and insulation integrity, and a fall/winter review for any gaps that may have opened during dry, cold months.
Make filter changes routine and verify that returns remain clear of storage items or furniture. If you add or remodel rooms, revisit your duct map; changes in layout can alter airflow needs and warrant rebalancing or resizing. The more you maintain awareness of your duct system, the less likely you are to face sudden comfort problems when weather swings in Readington.
Readington-specific notes
Many local homes feature basements where returns are tempted to draw from open utility spaces. Ensure returns are sealed and filters fit properly to avoid pulling in dust or odors. In rural parts of the township, critters can disturb attic insulation; inspect for nesting and restore insulation promptly if displaced. Keep an eye on condensation lines at the air handler; a clogged drain can add moisture to the return plenum, which undermines duct performance.
Cold snaps can emphasize weak points in distribution. If second-floor bedrooms lag, sealing near the air handler and along the main supply trunk often provides the largest gain before you start adjusting distant branches. When comfort remains uneven after sealing and balancing, a professional might suggest strategic duct modifications as a second phase.
Frequently asked questions
How long should mastic cure before running the system? Follow the product label; many mastics set quickly but benefit from several hours of curing. Provide ventilation and avoid disturbing sealed joints while curing completes.
Do I need special tape for insulation seams? Yes, use UL-listed foil tape compatible with the insulation facing to maintain a vapor barrier. Avoid cloth tapes, which degrade in HVAC conditions.
Why does dust appear around some registers? Air leakage at the boot-to-drywall connection can pull dust from wall cavities. Sealing that gap often eliminates visible streaks and improves airflow.
Can I fix a crushed flex run without replacing it? Minor kinks can be smoothed by repositioning supports. Severe crushing that damaged the inner liner should be cut out and replaced to prevent turbulence and leaks.
What if I find mold near ducts? Address moisture sources first, improve insulation and sealing, and consult a professional if growth is extensive or in difficult-to-reach areas. Avoid disturbing growth without proper containment and PPE.
Move forward with confidence
With a clear checklist, you can tackle air duct repairs systematically and safely, focusing first on the steps that deliver the biggest comfort gains. Prepare thoroughly, seal diligently, insulate wisely, and verify your results with simple tests and careful observation. Keep notes and photos so you can maintain improvements season after season. And when a section lies beyond safe access or requires specialized tools, bring in local experts who know the area’s homes and climate. For dependable help that complements your checklist and completes the job the right way, schedule trusted air duct repair services and enjoy balanced, efficient airflow throughout your Readington home.
